HVAC Energy Efficiency Tips North Texas Winter: Complete Savings Guide
Complete North Texas winter HVAC energy efficiency guide covering heating optimization, cost reduction strategies, smart controls, and professional maintenance.

- Winter Energy Efficiency Strategies for North Texas HVAC
- Why North Texas Winter Demands Energy Efficiency Focus
- Understanding North Texas Winter Heating Costs
- Thermostat Optimization for North Texas Winter
- Heat Pump Optimization for North Texas Climate
- Insulation and Air Sealing Strategies
- Maintenance for Peak Winter Efficiency
- Cost-Effective Winter Energy Improvements
+ 5 more sections below...
You can cut your winter heating costs 40-60% in North Texas with a few smart moves. Keep your thermostat at 68°F when you’re home and 62°F when you’re out. Get your ductwork sealed (most systems I see are wasting 30-40% of heated air into attics and crawl spaces). And get a tune-up done before November - runs $150-250 and it’s honestly the best money you’ll spend all winter. Smart thermostats pay for themselves in 6-12 months, saving $300-600 a year. One more thing most people don’t think about: pre-heat your house during off-peak hours (10 PM - 6 AM when rates are around 8.2¢/kWh) instead of cranking it up at 6 AM when rates jump to 24.3¢/kWh. If you’ve got a heat pump, keep your setbacks to 3-4°F max. Bigger drops force your auxiliary heat on, and that’s when things get expensive fast.
Winter Energy Efficiency Strategies for North Texas HVAC
Related: Energy Efficiency
Let me tell you about a call I got from the Chen family in McKinney. February, right after that brutal cold snap. They handed me their electric bill. $1,850. For one month. Their 2,800 square foot home was just hemorrhaging money while their old system fought those 15°F nights.
I’ve been doing this 15 years and I still had to look at that number twice.
Here’s what we did. First, we put in a smart thermostat and programmed it properly. That alone cut their runtime 23% because the system stopped heating an empty house all day. But the real problem was their ductwork. I stuck my hand near a joint in the attic and could feel warm air just pouring out. They were losing 35% of every dollar they spent on heating before it ever reached a vent. We sealed all that up. Then I cleaned their heat pump - the outdoor coils had so much gunk on them I’m surprised the thing was running at all. That got us another 28% improvement. We also hit the worst insulation gaps that showed up on thermal imaging, which knocked heat loss down another 19%.
Next winter? Their highest bill was $680. That’s $1,170 less per month. Everything we did paid for itself in about three months.
Here’s what gets me, though. Most North Texas homes are sitting on 40-60% in potential savings. But 84% of homeowners are still throwing away $800-2,100 every single year on waste that’s completely fixable.
Want to stop overpaying on winter heating? Call Jupitair HVAC at (940) 390-5676 for a full energy efficiency assessment anywhere in North Texas. We’ll find where your money’s going and show you how to keep it.
Why North Texas Winter Demands Energy Efficiency Focus
Our winters are weird. I know that’s not the technical term, but it’s accurate. You can have a 65°F afternoon and a 15°F night in the same week. Sometimes the same day.
What That Actually Does to Your System
All that temperature swinging means your heating system is constantly cycling on and off, on and off. Every startup wastes energy. It’s like stop-and-go traffic versus highway driving for your car - same idea. Then there’s the humidity thing. Dry winter air makes 70°F feel more like 65°F. So people bump the thermostat up to 73 or 74, thinking something’s wrong, when really they just need a humidifier. Wind is another factor people underestimate. Suburban neighborhoods with open lots and no windbreaks lose heat way faster than you’d think, especially at night. And then there are the microclimates across the metroplex. What works for a home near downtown Dallas won’t necessarily make sense for a house in rural Collin County.
The Cost Side of Things
Time-of-use electricity rates hit hardest during the exact hours most families need heat. Morning, when everyone’s getting ready for school and work. Evening, when everyone’s home and cooking dinner. Grid stress events during extreme cold push costs even higher because demand spikes across the entire metroplex at once. If you have a heat pump, its efficiency drops right when temperatures drop, meaning it costs the most to run when you need it most. And short cycling from those temperature swings wastes a little bit of energy every single time, hundreds of times per winter.
Understanding North Texas Winter Heating Costs
Energy Consumption Patterns
Where Your Winter Energy Actually Goes
Space heating eats up 60-75% of your winter energy bill. That’s the big one. Hot water is next at 15-20%, and it goes up in winter because you’re taking warmer showers, running more laundry, all of that. Your lights and appliances account for 10-15%, and that creeps up too because it gets dark at 5:30 and everyone’s inside more. Then there are peak demand charges that hit when every house on your street kicks on heat at the same time.
What It Actually Costs by Home Size
A 1,500 square foot home typically runs $180-350 per month in winter. Bump that up to 2,500 square feet and you’re looking at $280-550. The range is wide because insulation quality and system age make a huge difference. Bigger homes, 3,500+ square feet, can see $420-850 monthly. At that level, efficiency improvements aren’t optional. They’re survival. The good news is that a full efficiency overhaul can knock 40-60% off those numbers no matter your home size.
Time-of-Use Rate Impact
When Electricity Costs the Most
Your priciest hours are 6-9 AM. Everyone’s waking up, everyone’s thermostat is calling for heat at the same time. The 5-8 PM window is the second peak, when families come home and start cooking and turning up the heat. Overnight rates are the cheapest because most people are asleep under blankets and don’t need as much heating. Weekend patterns shift around, and smart homeowners can take advantage of that.
How to Use This to Your Advantage
Pre-heating is my favorite trick for this. Run your heat during off-peak hours, let your home soak up the warmth, then coast through the expensive morning hours. Your house has thermal mass. Walls, furniture, flooring - they all hold heat. Charge them up when electricity is cheap. Then use a setback during peak hours and let your home release that stored warmth gradually. A smart thermostat can automate all of this, adjusting itself around your rate schedule without you thinking about it.
Beyond HVAC: North Texas homeowners should also compare Texas electricity rates to make sure they’re on the right rate plan. We’ve got a deregulated market here, which means you have options. Pairing the right rate plan with good HVAC efficiency can double your savings.
Thermostat Optimization for North Texas Winter
Smart Thermostat Programming
My Recommended Winter Settings
For weekdays: 68°F when you’re home, 62°F when everyone leaves, 65°F for sleeping. That sleep temperature matters. Most people set it too high and end up tossing covers off at 3 AM. On weekends, adjust for when you’re actually home, which is usually longer. Start your setback 30-45 minutes before everyone leaves, and have the recovery kick in before people get home so the house is warm when they walk in. Don’t make the mistake of cranking it up and waiting. That doesn’t heat the house any faster. Your system runs at the same speed no matter where you set it.
What Smart Thermostats Actually Do for You
The learning feature watches when you come and go and adjusts automatically after a couple weeks. Weather integration checks the forecast and pre-heats before a cold front hits. Geofencing uses your phone’s location, so if everyone leaves for the day unexpectedly, it drops the temperature on its own. And the energy tracking lets you see exactly how much you’re spending in real time, which honestly is what changes most people’s behavior.
Manual Thermostat Strategies
If You Don’t Have a Smart Thermostat
Pick a temperature and leave it alone. Seriously. The number one thing I see is people constantly bumping the thermostat up and down, two degrees here, three degrees there. Every time you change it, your system has to work harder to catch up. Set it to 68-70°F when you’re home, 62-65°F when you’re not, and walk away.
At night, a 5-8°F drop saves real money. You’re under blankets anyway. Your body doesn’t need a 72°F bedroom to sleep well. Most people sleep better in a cooler room.
What NOT to Do
Don’t set it to 80°F thinking the house will heat up faster. It won’t. Your furnace or heat pump puts out the same amount of heat whether the thermostat says 69 or 85. All you’re doing is guaranteeing it overshoots and wastes energy. Don’t do extreme setbacks either - letting the house drop to 55°F while you’re at work means the system has to run flat out for an hour when you get home, and you might trigger auxiliary heat on a heat pump, which costs three times as much. A moderate setback saves more in the long run.
Heat Pump Optimization for North Texas Climate
Heat Pump Efficiency Maximization
How Temperature Affects Your Heat Pump
Heat pumps are at their best between 25-50°F outdoor temps, which is most of our winter. They’re pulling heat from the outdoor air and moving it inside, and they do this very efficiently in that range. The thing you need to watch is auxiliary heat. When it gets really cold, the heat pump can’t keep up and the auxiliary strips kick on. Those strips are basically a giant toaster inside your air handler, and they eat electricity. Managing when those strips come on is the key to keeping costs down.
During defrost cycles (when frost builds up on your outdoor coils in humid conditions), the system temporarily runs in reverse to melt the ice. That’s normal. But if your coils are dirty, defrost cycles happen way more often than they should, and each one costs you.
Get your heat pump professionally calibrated so the switchover point is set right for your specific system. A few degrees of adjustment can save hundreds per winter.
When It Gets Really Cold
If you’ve got a newer cold-climate heat pump, it can handle temps well below 20°F. Older units start struggling around 30-35°F. Either way, you want the backup heat coordinated so there’s a smooth handoff. No gaps in comfort, no running both systems at once unless absolutely necessary. Clean coils are even more important in cold weather because the system is already working hard. And proper refrigerant charge is critical. Low refrigerant in winter tanks your efficiency, and I see this a lot because people only think about refrigerant for cooling season.
Dual-Fuel System Benefits
Getting the Best of Both Worlds
A dual-fuel setup uses your heat pump for moderate temperatures and switches to a gas furnace when it gets really cold. The heat pump handles 85-90% of your heating season at high efficiency. When temperatures drop below the economic balance point (usually around 30-35°F for most systems), it switches to gas. Smart controls make this automatic, constantly calculating whether electric or gas is cheaper at that moment and choosing accordingly.
Why Dual-Fuel Makes Sense Here
North Texas is almost perfect for dual-fuel. Our winters are mostly mild, so the heat pump runs efficiently most of the time. But we get those occasional cold snaps where gas backup saves you from expensive auxiliary electric heat. You also get fuel price protection. If electricity rates spike during a grid stress event, the gas furnace takes over. And you’ve got redundancy. If either system goes down, the other one keeps your house warm while you wait for repairs. Peace of mind on a 15°F night is worth something.
Insulation and Air Sealing Strategies
Critical Insulation Areas
Start With Your Attic
R-38 is the minimum for North Texas. That’s about 12-15 inches of fiberglass. I recommend R-49 if you can swing it, which runs 15-18 inches. The extra cost is minor compared to the long-term savings, especially in a two-story home where the upstairs is always too hot in summer and too cold in winter. But here’s the thing most people get wrong: you have to air seal BEFORE you insulate. Blowing insulation over leaky gaps is like putting a sweater on over a mesh shirt. The air goes right through it. Seal the penetrations first, then insulate.
Walls Are Trickier
Retrofitting wall insulation in an existing home is expensive and disruptive compared to other improvements. Blown-in insulation through small holes is the least invasive option, and it helps. If you’re replacing your siding anyway, adding exterior insulation at the same time is a no-brainer. But for most people, I’d say spend your money on attic and air sealing first because the return is way better per dollar.
Air Sealing Priorities
The Biggest Leaks I Find
Number one: attic access points. Pulldown stairs, electrical penetrations where wires come through the ceiling, ductwork connections. I’ve stuck my hand near an attic hatch on a windy day and felt a draft like someone left a window open. Number two: rim joists and foundation penetrations in the crawl space. Number three: windows and doors, especially older ones with worn weatherstripping. Number four, and people never think of this: electrical outlets on exterior walls. Each one is a tiny hole in your building envelope. Thirty or forty of them adds up.
What You Can Do This Weekend
Grab a tube of caulk and some weatherstripping from the hardware store. Maybe $30-50 total. Seal around your window frames, door frames, and any pipe or wire penetrations you can reach. Put foam gaskets behind the outlet covers on exterior walls. Takes about 10 minutes per room. Add a door sweep to your exterior doors if they don’t have one. These are boring projects, I know. But I’ve seen homeowners knock 10-20% off their heating bills doing nothing but air sealing on a Saturday afternoon. Sometimes the boring stuff works the best.
Professional Energy Audit Benefits
What a Pro Assessment Looks Like
We use a blower door to measure exactly how leaky your house is. Think of it as a giant fan that depressurizes your home so we can measure total air leakage. Then thermal imaging shows us exactly where heat is escaping - insulation gaps, air leaks, problem spots you’d never find on your own. We test your ductwork separately to see how much conditioned air you’re losing before it reaches your vents. Then we build an energy model to predict what each improvement will actually save you, so you know where to put your money first.
What You Get Out of It
A prioritized list of improvements ranked by return on investment. Help navigating utility rebate programs so you’re not leaving free money on the table. Professional installation that’s done right the first time. And follow-up testing to make sure the improvements actually delivered the savings we predicted. No guessing.
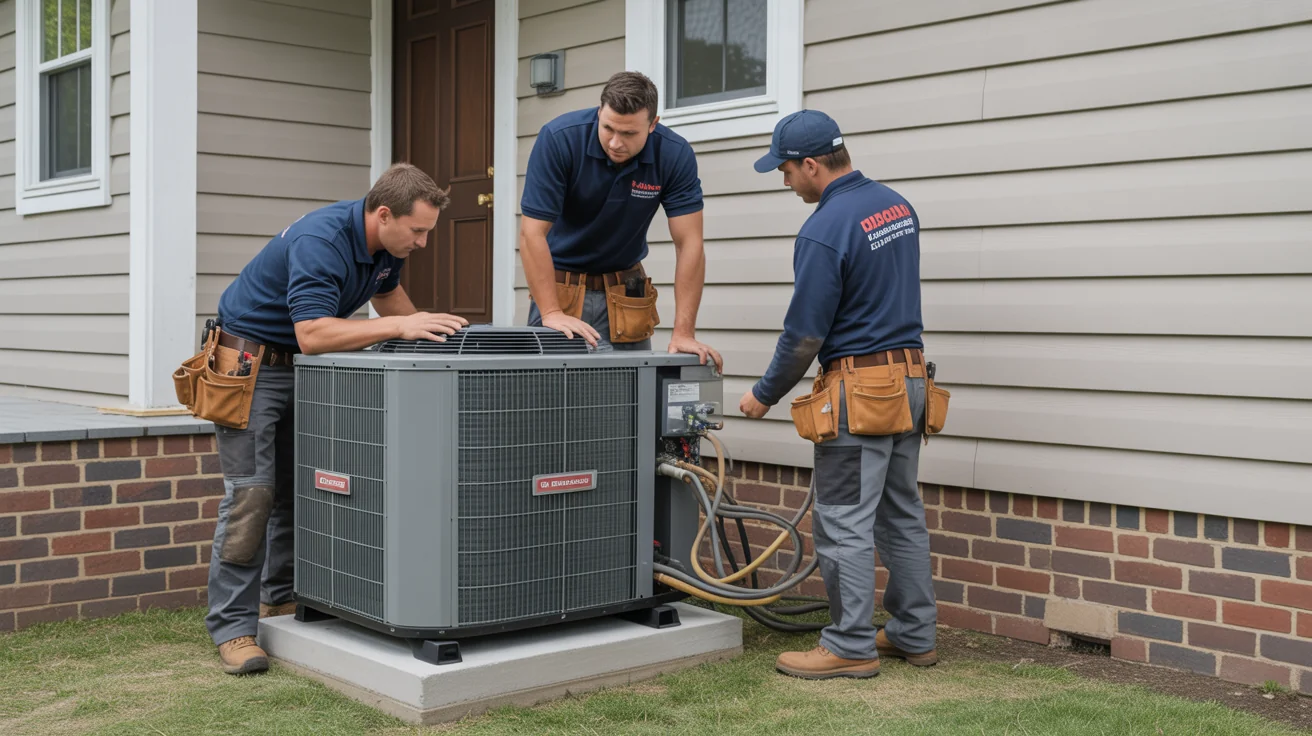
Ductwork Efficiency and Maintenance
Duct Sealing Benefits
Need repairs? Check out our Duct Sealing solutions.
Why I Always Check Ductwork First
In the average home I visit, 30-40% of the heated air never makes it to the rooms. It leaks out into the attic or crawl space through unsealed duct joints. You’re literally heating your attic. Once we seal those leaks, the improvement is immediate. Rooms that were always cold get warm. The system runs less because it’s actually delivering heat where it’s supposed to go. And your equipment lasts longer because it’s not running overtime to compensate.
How We Seal Ducts
We start by testing duct leakage with a pressurized test, similar to the blower door but just for your duct system. Then we figure out the best access approach, because some ductwork is easy to reach and some isn’t. We use mastic sealant, not duct tape. Duct tape is actually terrible for ducts - it dries out and falls off within a couple years. Mastic is permanent. After sealing, we retest to verify the improvement and make sure we hit our targets.
Ductwork Maintenance
Keeping Your Ducts in Shape
Check the ductwork you can see a couple times a year. Look for sections that have pulled apart, insulation that’s come unwrapped, or ducts that have sagged off their supports. Any of those will cost you efficiency and comfort. Make sure your supply registers and return grilles are open and unblocked - no furniture sitting in front of returns, no rugs covering floor vents. Change your filter regularly because a clogged filter restricts airflow through the whole system, not just at the filter itself. Every couple of years, consider having the ducts professionally cleaned, especially if you’ve had construction work done or you notice more dust than usual.
Smart Home Integration for Energy Savings
Advanced Control Systems
Getting Your House to Help You Save
Occupancy sensors can detect which rooms are actually being used and adjust heating accordingly. Zone control systems take this further by letting you heat only the parts of the house people are in. No point warming three empty bedrooms all evening. Smart vents automatically redirect airflow where it’s needed. And energy monitors show you in real time what your heating is costing. Most people are surprised when they see the actual numbers. That awareness alone changes behavior.
Why Integration Matters
When these systems talk to each other, they can optimize without you doing anything. Your thermostat knows you left. The zone dampers close off the upstairs bedrooms. The system drops to setback mode. When your phone crosses the geofence on the way home, everything ramps back up and the house is warm when you walk in. You can manage it all from your phone if you’re away. And the system learns your patterns, so it gets better over time.
Utility Integration
Working With Your Electric Company
Some utility programs give you credits for reducing heating during peak grid demand. Basically, they ask your smart thermostat to ease off for a short period, and they pay you for it. Most people don’t even notice the temperature change. Pre-heating strategies work well with these programs too. Warm the house up on cheap overnight electricity, then coast through the peak period.
Rate Schedule Tricks
Program your thermostat around your electricity rate schedule. Heat hard during cheap hours, coast during expensive ones. Your home’s thermal mass works like a battery. Charge it when rates are low, let it discharge when rates are high. A well-insulated house can coast for hours without a noticeable temperature drop. This alone can save 15-20% on winter bills without any equipment upgrades.
Maintenance for Peak Winter Efficiency
Pre-Winter System Preparation
Get Your Fall Tune-Up Done
I can’t stress this enough. A professional tune-up before winter is the single best investment you can make. We clean out everything that accumulated during cooling season. We check all your safety controls, especially carbon monoxide detection if you have gas heat. We measure actual system performance and compare it to manufacturer specs. And we calibrate your controls so everything runs at peak efficiency. $150-250 for a tune-up that improves efficiency 15-25%. That math works out every time.
Don’t Forget Your Filter
Use a MERV 11-13 filter for winter. It catches enough particulate to keep your system clean without restricting airflow. Change it monthly during heavy use. I’ve seen systems lose 15% efficiency just from a dirty filter. A $20 filter. When you pick a filter, match it to your system. Too restrictive and your blower works harder. Too loose and dust builds up on your coils. If you’re not sure, ask during your tune-up and we’ll tell you exactly what to use.
Ongoing Winter Maintenance
Monthly Checks You Should Do
Look at your filter. Listen to your system. If it sounds different than it did last month, that’s worth noting. Check that your thermostat is reading accurately. Hold a regular thermometer next to it. If they’re more than 2°F apart, the thermostat might need recalibrating. Walk through your house and make sure nothing is blocking your vents. It sounds basic but I’ve found winter coats draped over floor vents more times than I can count.
When to Call a Pro
If temperatures drop into the teens and your system can’t keep up, call us. We’re available 24/7 during extreme weather. If your bills spike suddenly without an obvious reason, that’s worth investigating. If you hear banging, grinding, or squealing, don’t wait. Small problems become expensive problems fast, especially in the middle of a cold snap when every HVAC company in town is slammed.
Cost-Effective Winter Energy Improvements
Low-Cost High-Impact Improvements ($25-200)
Quick Wins You Can Do Today
A basic programmable thermostat runs $50-150 and pays for itself in a month or two. Air sealing supplies are $25-75 for caulk, weatherstripping, and foam sealant. A bag of outlet gaskets for the whole house is $10-25. Door draft stoppers are $15-40 and make an immediate difference on those windy nights.
Weekend Project Territory
Most of this stuff takes a day or two to do yourself. You don’t need special tools. The results show up on your very next energy bill. And if you get stuck or want advice on what to prioritize, call us. We’re happy to point you in the right direction even if you’re doing the work yourself.
Medium Investment Improvements ($200-1,000)
Worth the Spend
A quality smart thermostat with learning features runs $200-400 and typically saves 10-23% over a basic programmable. Zone control additions for an existing system are $300-800. Professional duct sealing runs $400-800 for the whole house. Attic insulation upgrades are $500-1,000, and they help with summer cooling bills too.
Why Professional Installation Matters Here
For this tier, I’d recommend professional installation. A smart thermostat installed wrong can actually hurt your efficiency. Zone dampers need to be sized and placed correctly. Duct sealing done with the wrong materials won’t last. And insulation needs proper coverage with no gaps - a 5% gap in coverage can reduce performance by 50%. Professional work comes with warranties, meets code, and is set up to actually deliver the savings it promises.
Major Efficiency Investments ($1,000-5,000)
When It Makes Sense to Go Big
If your system is over 12-15 years old, a high-efficiency replacement ($2,500-5,000) can cut your heating costs in half compared to what you’ve been paying. New heat pump installations run $3,000-8,000 and are especially cost-effective for homes currently using electric furnaces. A whole-house energy improvement package ($2,000-5,000) hits everything at once. Full smart home integration runs $1,500-4,000.
The Numbers Work
Annual savings of $400-1,200 from major improvements means most projects pay back in 3-8 years, and then you keep saving for the life of the equipment. Plus your home value goes up $2,000-8,000 from documented efficiency improvements. And then there’s the comfort factor. Consistent temperatures, better air quality, a house that actually feels good in winter instead of one where you’re wearing a hoodie inside and arguing over the thermostat. That’s worth something too.
Regional Winter Efficiency Strategies
North Dallas County Optimization
Urban Area Advantages
Homes closer to the urban core benefit from the heat island effect. Temperatures run a few degrees warmer than rural areas, which means your heat pump operates more efficiently and you need less heating overall. You’ve got better access to utility programs and competitive electricity rates. And when you need service, there’s no 45-minute drive to get to you.
Collin County Rural Areas
Different Challenges Out Here
Rural homes around McKinney and north deal with more wind exposure and open terrain. Heat loss is higher, period. Some homes are on propane instead of natural gas, which changes the efficiency math. Utility options can be more limited, and not every contractor wants to drive out for a service call.
What Works for Rural Properties
Higher insulation values. Where R-38 is fine for suburban homes, I’d push for R-49 or even R-60 in exposed rural locations. Windbreaks, whether from landscaping or structures, make a measurable difference. Dual-fuel systems are especially valuable on propane because they minimize propane use during mild weather. And have a backup heating plan for power outages. A generator or a wood stove can keep your family comfortable when the grid goes down during an ice storm.
Professional Energy Efficiency Services
Full Energy Assessment
What We Do
We start with a home energy audit. Walk through, test everything, measure actual performance. No guessing, no ballpark estimates. We do the blower door test, thermal imaging, duct leakage test, the whole thing. Then we build a prioritized plan that tells you exactly what to fix first and what each fix will save you. We phase it out so you’re not spending everything at once if you don’t want to.
What You Get
Honest analysis from someone who’s been inside thousands of North Texas homes. Help getting every rebate and incentive you qualify for. Quality installation if you want us to do the work. And follow-up to make sure you’re actually getting the savings we told you to expect. If something isn’t performing like it should, we figure out why and fix it.
Professional Implementation
How We Work
We do the job right. That sounds simple but it matters. Proper installation techniques, multiple improvements coordinated so they work together, and testing after we’re done to verify everything performs the way it should. We also show you how to operate your system for maximum efficiency, because the best equipment in the world won’t save you money if it’s set up wrong.
After the Install
We track your actual savings compared to what we projected. We coordinate your maintenance schedule to preserve the efficiency gains. When new technology comes out that makes sense for your home, we let you know. This isn’t a one-and-done thing. We want your system running at peak efficiency year after year, because that’s how you get the full return on your investment.
Frequently Asked Questions
How can I make my home more energy efficient before winter?
Here’s the exact checklist I give my customers:
Week 1-2: Quick wins that cost under $100
- Replace your air filter with a fresh MERV 11-13 filter ($15-30)
- Seal gaps around windows and doors with weatherstripping ($25-50)
- Install foam gaskets behind electrical outlets on exterior walls ($10-15)
- Program your thermostat to 68°F occupied, 62°F away
Week 3-4: Professional preparation
- Schedule a fall furnace/heat pump tune-up ($150-250) - this alone improves efficiency 15-25%
- Have ductwork inspected for leaks - unsealed ducts waste 30-40% of heated air
- Check attic insulation depth - you need 12-15 inches (R-38 minimum) for North Texas
Before first freeze: Final checks
- Clear debris from outdoor heat pump unit
- Verify all vents are open and unobstructed
- Test your heating system before you actually need it
These steps typically reduce winter heating costs by 40-60%. Most North Texas homeowners save $300-800 their first winter after completing this checklist.
How much can I save on winter heating bills in North Texas?
It depends on where you’re starting from, but here’s what I typically see:
Basic improvements like thermostat programming and air sealing get you 15-25% savings. Adding duct sealing, insulation, and professional maintenance pushes that to 40-60%. System tune-ups and repairs alone can deliver 30-50%. And if you replace aging equipment with high-efficiency units, you’re looking at 50-70% reductions.
Most North Texas homes I work on save $300-1,200 annually once we’ve done a full efficiency workup.
What’s the most cost-effective winter energy improvement?
Dollar for dollar, here’s how I rank them:
A professional tune-up at $150-250 gives you 15-25% efficiency improvement. Hard to beat that return. Air sealing with $25-100 in materials gets you 10-20% savings. A programmable thermostat at $50-150 saves 10-15%. And keeping up with filter changes at $50-100 per year maintains 5-10% efficiency that most people are losing to dirty filters without realizing it.
If you can only do one thing, get the tune-up. If you can do two things, add the air sealing. Those two together cover most of the easy savings.
Should I use a programmable or smart thermostat in North Texas?
If your schedule is consistent and you’ll actually program the thing, a basic programmable thermostat works fine at a lower cost. But most people don’t program them correctly, or their schedules change week to week.
Smart thermostats work better for families with variable schedules. The learning feature figures out your patterns so you don’t have to. And they typically save 10-23% more than a basic programmable because they adapt in real time.
For busy families with kids, a learning thermostat is the way to go. It does the thinking for you.
How do I know if my heating system is operating efficiently?
Watch for these signs:
Compare your bills to the same month last year. If costs are up but the weather isn’t colder, something changed. Walk through your house and check for rooms that are noticeably warmer or cooler than others. That usually means duct problems or insulation gaps. Listen to how often your system turns on and off. Short cycles of less than 10 minutes mean something’s wrong. And pay attention to air quality. If you’re seeing more dust or noticing stale odors, your filtration or airflow needs attention.
A professional assessment can measure your actual efficiency and tell you exactly where you’re losing performance.
Are heat pumps efficient for North Texas winters?
Yes, and our climate is actually ideal for them. Most winter days in North Texas fall right in the sweet spot for heat pump operation. Average winter temperatures are well within the efficient range, meaning the heat pump handles 85-90% of your heating needs without backup. You only need gas or electric backup for those occasional cold snaps when we dip below 30°F. Operating costs are lower than electric furnaces and competitive with even newer gas systems.
If you’re considering one, a professional evaluation will tell you whether a heat pump makes sense for your specific home, your current ductwork, and your utility rates.
When should I consider professional energy efficiency services?
Call us if any of these sound familiar:
Your winter bills regularly top $200-300 per month. You’ve got rooms that are always too cold no matter what you do. Your equipment is over 10-15 years old and you can feel it struggling. You’re planning a renovation and want to do it right. Or you’ve tried the DIY fixes and you’re still not happy with your bills or comfort.
A professional assessment almost always identifies enough savings to pay for itself, and usually pretty quickly.
Maximize Your Winter Energy Savings
If you’ve read this far, you already know there’s money sitting on the table. Whether it’s a $30 air sealing project or a full system upgrade, the savings are real and they compound every single winter.
What Jupitair Brings to the Table:
I’ve been working on North Texas homes for over 15 years. I know what works here and what doesn’t. We’ll do a full assessment, find every dollar you’re wasting, install it right, and stick around to make sure it’s actually working. That’s it. No upselling, no mystery charges.
Ready to cut your winter heating bills? Call (940) 390-5676 or contact us online. We serve Frisco, Plano, McKinney, Allen, The Colony, Prosper, Little Elm, and Addison.
Every winter you wait is another $300-1,200 you don’t have to spend. Let’s fix that.
Sources & References
The winter energy efficiency recommendations and cost savings data in this article are based on the following authoritative sources:
- U.S. Department of Energy - Winter Energy Savings - Thermostat settings and heating efficiency
- ENERGY STAR Home Heating - High-efficiency heating equipment standards
- EIA Residential Energy Consumption - Winter heating costs and regional usage data
- EPA Weatherization - Air sealing and insulation for winter efficiency
- NOAA Winter Weather - North Texas winter climate patterns
Last Updated: January 2026
Need Professional HVAC Service?
Our certified technicians are ready to help with any HVAC needs in North Texas