HVAC Component Replacement Procedures
HVAC component replacement procedures for North Texas. Professional techniques for safely replacing major system components.
- The Critical Importance of Proper Component Replacement
- Understanding Component Failure Patterns in North Texas
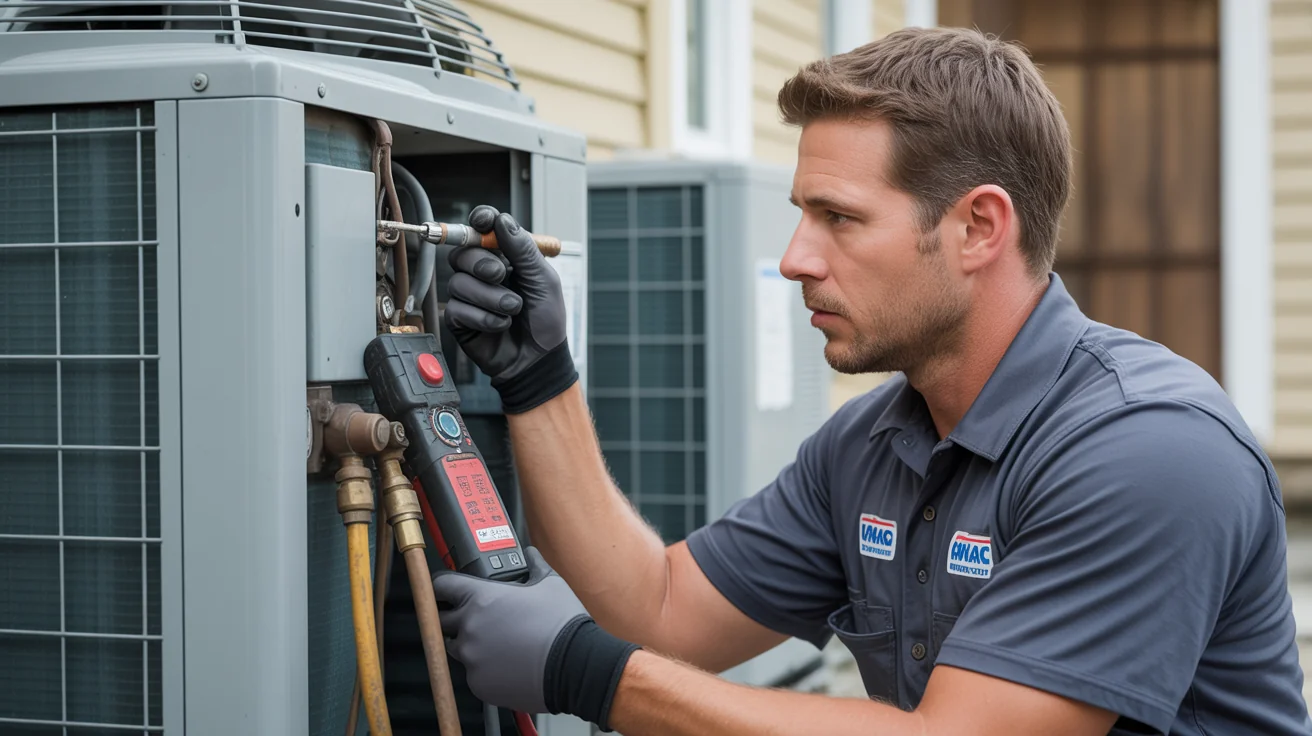
- Compressor Replacement Procedures
- Professional Compressor Replacement Procedure
- Heat Exchanger Replacement Procedures
- Professional Heat Exchanger Replacement
- Evaporator Coil Replacement Procedures
- Professional Evaporator Coil Replacement
+ 16 more sections below...
- The Critical Importance of Proper Component Replacement
- Understanding Component Failure Patterns in North Texas
- Compressor Replacement Procedures
- Professional Compressor Replacement Procedure
- Heat Exchanger Replacement Procedures
- Professional Heat Exchanger Replacement
- Evaporator Coil Replacement Procedures
- Professional Evaporator Coil Replacement
+ 16 more sections below...
HVAC component replacement in North Texas runs anywhere from $200 for a capacitor up to $5,000 for a compressor swap, and compressor jobs take me 6-10 hours when done right. That includes system flushing, filter-drier replacement, and contamination testing. Here’s a number that should scare you: about 60% of compressor replacements fail within two years. Not because the part was bad. Because the contractor who installed it skipped steps. No oil analysis, no acid test, no nitrogen purge. Just slapped it in and collected the check. Our North Texas climate makes things worse. Systems run 12-16 hours a day all summer, temperatures swing 30-40 degrees in a single day, and the power grid… well, you know how the Texas grid is. All of that eats components about 40% faster than places with milder weather. One rule I never break: always replace filter-driers during compressor work. Skip that “extra” step and you’re pumping contamination right through your brand new compressor.
The Critical Importance of Proper Component Replacement
I got called to a house in Plano a couple summers ago. Family I’ll call the Johnsons. Their AC compressor died during a 105-degree week in July. They’d gotten a quote from another contractor who was $800 cheaper than what I’d charge.
They went with the cheaper guy. Can’t blame them, honestly.
Six weeks later the new compressor was dead. The contractor hadn’t flushed the lines, hadn’t replaced the filter-driers, hadn’t even checked for contamination. He basically dropped a brand new compressor into a system full of acid and metal shavings from the old one. Might as well have poured sand into a car engine.
By the time I got involved, the damage was ugly. Second compressor replacement, complete system flush, new expansion valve, new filter-driers on top of all that. Three weeks without AC in the worst heat of the year. Final bill came to around $8,900. The professional job would’ve been $3,800 from the start.
That’s not a horror story I’m making up to scare people. I see versions of it three or four times every summer.
When I do a component replacement, I’m doing contamination analysis before I install anything. If there’s acid in the system, I deal with that first. I follow manufacturer specs to the letter because that’s how you keep warranty coverage valid and parts lasting their full lifespan. Every joint gets leak-tested before I button things up. And yeah, all the refrigerant handling is EPA-compliant. I’ve got my Universal certification and I take it seriously.
North Texas is just brutal on equipment. Professional procedures aren’t some upsell here. They’re the difference between a repair that holds and one that puts you right back where you started.
Understanding Component Failure Patterns in North Texas
After 15-plus years doing this work across North Texas, I’ve got a pretty clear picture of what kills equipment out here.
Temperature swings are the big one. We’ll have a 95-degree afternoon and a 55-degree morning. That’s constant expansion and contraction on metal components, and eventually something cracks. I see heat exchanger failures from this all the time.
Then there’s the electrical grid. Texas power fluctuates more than most places, and those surges and brownouts chew through capacitors, control boards, and motors. I’ve replaced capacitors in neighborhoods where the power company was doing work nearby, and every unit on the block had popped caps within a month.
Humidity plus heat cycling creates corrosion that eats coils and connections faster than you’d think. Copper line sets develop pinhole leaks. Contactor terminals corrode. It adds up.
And runtime. A system in Minnesota might run four or five hours on a hot day. Here in Frisco or McKinney, your AC might run 14 hours straight in August. That kind of wear turns a 15-year compressor into a 7-year compressor.
Then you’ve got the weather events. Hail hammering condenser fins, power surges from storm activity, wind-blown debris. Emergency calls.
What actually makes replacements last here:
You can’t just meet manufacturer minimum specs and call it good. Our conditions demand premium components and installation practices that go beyond the baseline. That means proper nitrogen purging during brazing, proper system cleaning, proper evacuation times. It means making sure the new part works well with everything else in the system, not just by itself on a bench. And it means building in some extra protection where you can, because a system sitting on a concrete pad in Plano is going to take more abuse than one in Portland.
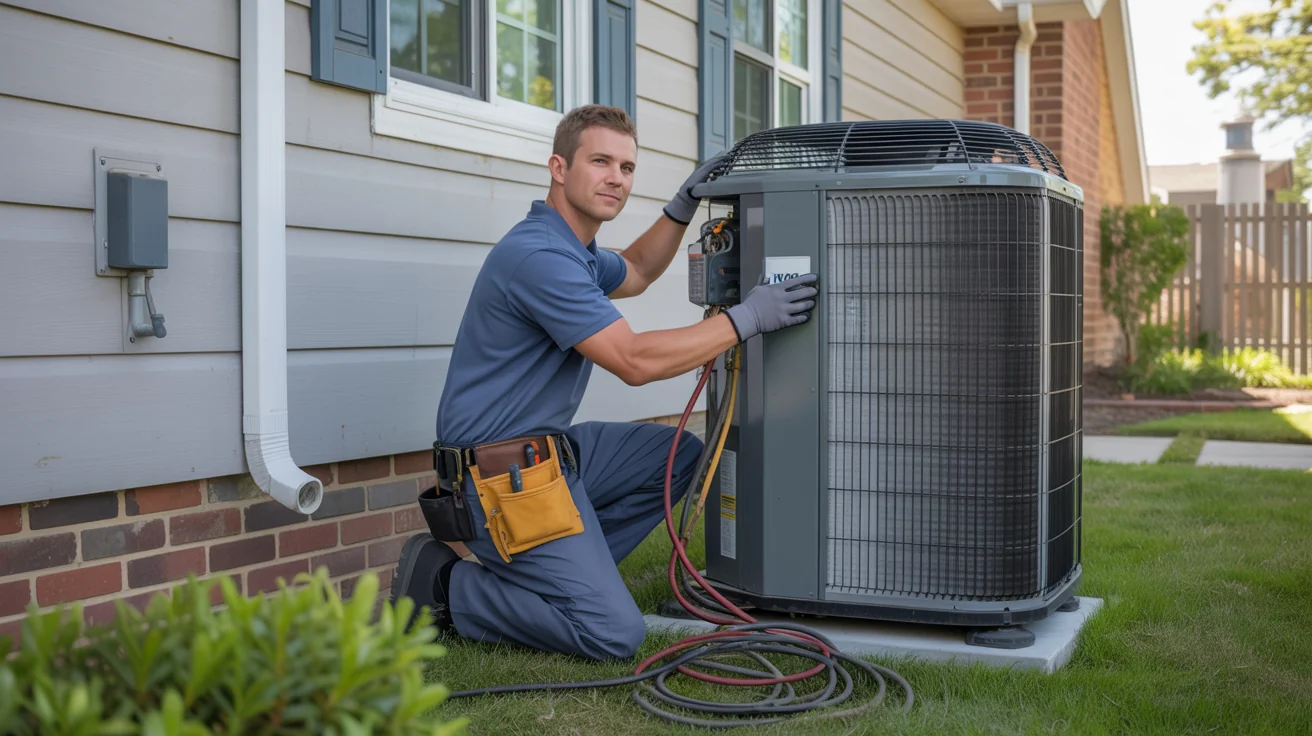
Compressor Replacement Procedures
Compressor Failure Analysis and Replacement Planning
Why do so many compressor replacements fail?
I’ll say it plainly. Most guys don’t bother figuring out what killed the first compressor. They pull it, put a new one in, and hope for the best. That’s a coin flip, not a repair.
1. Failure Mode Investigation
Before I order a new compressor, I need to know what happened. Was it an electrical failure? Winding burnout, bad capacitor, voltage issues? Because if the power supply fried the last one, it’ll fry the next one too unless I fix the underlying problem. Mechanical failure is different. Bearing wear, refrigerant flood-back, lubrication breakdown. Each one points to a different root cause. And then there’s contamination. When a compressor burns out, it dumps acid and metal particles into the whole system. If you don’t deal with that, you’re just feeding poison to the replacement.
2. System Contamination Assessment
This is the step that separates a $3,800 job that lasts from a $3,800 job that fails.
My Contamination Analysis Protocol:
1. Oil analysis reveals contamination type and severity
2. Acid test kits show if the system is "poisoned" with acids
3. Moisture testing determines if the system needs deep dehydration
4. Filter-drier condition shows how well the system was protected
5. System flushing requirements based on contamination levels
I’ve pulled oil samples from systems that looked like coffee. Black, gritty, acidic. Installing a new compressor into that would’ve been throwing money away. Literally weeks before failure.
Professional Compressor Replacement Procedure
Phase 1: System Preparation and Safety (45-60 minutes)
1. Complete System Lockdown
There are no shortcuts here and I won’t pretend otherwise. Refrigerant systems run at pressures that can seriously hurt you.
I lock out power at both the main panel and the equipment disconnect. Not just flip the breaker. Lock-out/tag-out, every time. Then I do full EPA-compliant refrigerant recovery down to legal levels. Not “close enough” levels. After that, I verify zero pressure throughout the entire system with gauges before I open a single connection. Some guys just turn off the breaker and start cutting. I’ve seen the scars on a few of those guys.
2. System Assessment and Planning
I look at access first. Some compressors sit in tight spots and need rigging or even a crane to get out. I need to know that before I start, not after I’ve got the unit half apart. Then I verify the replacement specs match exactly. Close enough isn’t good enough when you’re talking about a $2,000-$4,000 part. I also figure out which supporting components need to come out with it. Filter-driers, expansion devices, contactors. Better to have everything on the truck than to make a supply house run mid-job.
Phase 2: Compressor Removal (60-90 minutes)
1. Refrigerant Line Disconnection
This isn’t demolition. Every cut matters because these are the same lines the new compressor will use.
I verify line sizes against the new compressor specs first. Mismatched lines destroy performance. Cuts are clean and precise. I seal every open end immediately because moisture is the enemy of refrigerant systems. Even twenty minutes of exposure to humid Texas air can introduce enough moisture to cause problems. And every connection gets labeled. I’ve been doing this long enough that I could probably reassemble most systems from memory, but I tag everything anyway. Memory fails when you’re eight hours into a job in 100-degree heat.
2. Electrical Disconnection
I label every wire. I take photos of every connection before I touch anything. Conduit gets inspected for heat damage or corrosion. Grounding gets checked.
This sounds tedious. It is. But guessing which wire goes where during reassembly is how you burn out a brand new compressor on startup. I’ve fixed a few of those mistakes for other contractors. Expensive lesson.
3. Mechanical Removal
Check mounting hardware condition, assess isolation pads, clear the workspace, get the old unit out safely. If mounting brackets or rubber isolators are shot, now’s the time to replace them. Not after the new compressor is already bolted down.
Phase 3: System Cleaning and Preparation (90-120 minutes)
1. System Flushing Procedures
This is the part that makes or breaks the whole job. It’s also the part most contractors skip because it takes time and nobody sees you do it.
My System Decontamination Protocol:
1. High-pressure nitrogen purging removes all contamination and debris
2. Complete filter-drier replacement (liquid line AND suction line)
3. Acid neutralization treatment if contamination testing shows problems
4. Multiple nitrogen purges until the system is surgically clean
5. Deep vacuum testing verifies system integrity and cleanliness
I’ve seen guys save an hour by skipping this, then spend six hours on a warranty callback three months later when the new compressor dies. Math doesn’t work out.
2. Supporting Component Assessment
Filter-driers get replaced. Every single time. No exceptions. This is a hill I will die on.
TXVs and orifice tubes often need to go too after a compressor failure, especially a burnout. Accumulators and receivers trap contamination and usually need swapping. On heat pumps, the reversing valve takes a look because whatever killed the compressor may have damaged it too.
Phase 4: New Compressor Installation (120-180 minutes)
1. Compressor Preparation
When you’re about to install a part that costs as much as a used car, every detail matters. I verify model number, electrical ratings, mounting dimensions against what the system needs. I check the oil charge. Wrong oil type or wrong quantity will kill a compressor just as dead as contamination will. Terminals get prepped, mounting hardware gets organized.
2. Installation Procedures
Alignment has to be perfect. Vibration from a sloppy mount will work connections loose over time and eventually cause a refrigerant leak. My brazing uses silver-bearing alloys with continuous nitrogen purge. Electrical connections get proper termination and weather protection. Then I make sure everything integrates with the existing system. A compressor doesn’t run in isolation. It has to work with the metering device, the condenser, the air handler, the controls. All of it.
3. Brazing and Connection Procedures
Brazing is honestly more art than science once you’ve got the fundamentals down. But the fundamentals are non-negotiable.
My Professional Brazing Standards:
1. Continuous nitrogen purging prevents internal oxidation and contamination
2. Silver-bearing brazing alloys designed specifically for refrigerant systems
3. Precise heat control prevents component damage and ensures proper joint strength
4. Every joint gets visual inspection and electronic leak testing
5. Surgical cleanliness maintained throughout the entire process
If you’ve ever cut open a copper line and seen black flaking inside, that’s oxidation from brazing without a nitrogen purge. That stuff breaks loose and clogs metering devices and scores compressor valves. I’ve cleaned up too many of those jobs to ever skip the purge.
Phase 5: System Commissioning (90-120 minutes)
1. Leak Testing and Evacuation
This is where we prove the work is solid.
Pressure test to manufacturer specifications. Electronic leak detection on every joint and connection. Deep vacuum to pull out all moisture and non-condensables. Then a vacuum hold test. If that needle moves, there’s a leak and I’m finding it before I charge the system. Walking away from a leaking system isn’t an option.
2. Refrigerant Charging
Charge calculation has to account for system capacity, line lengths, and real-world operating conditions. I charge by weight and verify with superheat and subcooling readings under load. System gets tested through a full cooling cycle, and I document everything. Before-and-after pressures, temperatures, amp draws. That paperwork protects both me and the homeowner down the road.
Heat Exchanger Replacement Procedures
Heat Exchanger Assessment and Replacement Planning
Furnace Heat Exchanger Replacement:
Heat exchangers are a different animal. A cracked heat exchanger leaks combustion gases into your home’s air supply. Carbon monoxide. This is a safety call, not just a comfort call.
1. Heat Exchanger Failure Verification
I verify cracks with visual inspection, combustion analysis (checking CO levels and draft), pressure testing under operating conditions, and thermal imaging to spot hot spots. You’d be surprised how many heat exchanger “cracks” turn out to be normal expansion noises. But when there’s a real crack, there’s no patching it. The part comes out.
2. Replacement vs. Unit Replacement Decision
Here’s where I have to be honest with people, even when it means recommending a bigger job.
Heat Exchanger Replacement Analysis:
How old is the furnace? If it's 15+ years, putting a $2,000 heat exchanger into it might not be the smartest money. What does a new furnace cost versus just the part? A modern high-efficiency unit might pay for the price difference in energy savings within a few years. What's the warranty situation? And what does the customer actually want and what can they afford? I lay out the numbers and let people decide. No pressure either way.
Professional Heat Exchanger Replacement
Phase 1: System Disassembly (120-180 minutes)
1. Complete System Shutdown
Gas gets shut off and locked. Power gets isolated with lock-out/tag-out. Vent connections come off carefully. Then I start opening the furnace up to get access.
2. Component Removal
The burner assembly comes out first. Then I work my way to the heat exchanger connections through the blower assembly area. Control wiring gets disconnected and labeled. Then the heat exchanger itself comes out. On some furnaces this is straightforward. On others, especially older models, it’s a puzzle.
Phase 2: New Heat Exchanger Installation (180-240 minutes)
1. Installation Preparation
I confirm the replacement part is an exact match. Check fitment before I start reassembling everything around it. All gaskets and seals get replaced. Not reused. New. Mounting hardware gets inspected and replaced if there’s any question.
2. Assembly Procedures
Heat exchanger goes in with proper positioning and securing. Burner reassembly has to be right because burner alignment affects how the flame contacts the heat exchanger. Bad alignment causes hot spots, and hot spots cause new cracks. Venting gets reconnected properly. Controls get restored.
Phase 3: System Commissioning and Testing (90-120 minutes)
1. Safety and Performance Testing
Gas leak testing throughout every connection. Combustion analysis to verify the burner is running clean and efficient. Temperature rise across the heat exchanger to make sure it’s performing correctly. And every safety control gets tested. Limit switches, flame sensors, pressure switches. If any of those aren’t working, the furnace doesn’t get turned over to the homeowner.
Evaporator Coil Replacement Procedures
Evaporator Coil Assessment and Replacement
Coil Failure Analysis:
Evaporator coils fail for a few reasons. Refrigerant leaks from corrosion are the most common, especially on the older copper coils. Sometimes it’s contamination buildup that can’t be cleaned. Occasionally a coil gets so plugged with debris that cleaning won’t restore airflow. And sometimes a new condenser needs a matched coil to hit the right efficiency rating.
I check system compatibility carefully because coil and condenser have to be an AHRI-matched pair. Mismatched components kill efficiency and can damage the compressor.
Professional Evaporator Coil Replacement
Phase 1: System Access and Preparation (60-90 minutes)
1. System Shutdown and Recovery
Full EPA-compliant refrigerant recovery. Power lockout. Then I open up the air handler or furnace to get at the coil. On some systems this is easy. On others, especially horizontal attic installs here in North Texas, I’m working in a space I can barely fit into at 140 degrees. Fun times.
2. Coil Removal Procedures
Lines get cut and sealed. Condensate drain and pan disconnected. The old coil comes out. If there’s any biological contamination, like mold on the coil, I’m careful about containment so it doesn’t spread through the ductwork.
Phase 2: New Coil Installation (120-180 minutes)
1. Installation Preparation
Verify the replacement coil specs match. Check the existing drain pan. If it’s cracked or rusted, this is the time to replace it. Same with insulation around the coil cabinet. And access panels sometimes need modification to fit the new coil properly.
2. Installation Procedures
Coil gets positioned and supported correctly. Refrigerant connections are brazed with nitrogen purge, same as compressor work. Condensate drain gets reconnected and tested. I run water through the drain line to make sure it flows. A clogged condensate drain is the number one cause of water damage from AC systems, and I’d rather catch it now than get a panicked call later. Insulation goes back on to prevent sweating.
Electrical Component Replacement Procedures
Motor Replacement Procedures
Blower Motor Replacement:
Phase 1: Motor Assessment and Selection (30-45 minutes)
1. Motor Specification Documentation
I pull all the nameplate data: voltage, amperage, RPM, rotation direction. Frame size, mounting dimensions, shaft specs. Starting components like run capacitors. And the CFM and static pressure requirements, because a motor that spins at the right speed but can’t push enough air is useless.
2. Replacement Motor Selection
Motor Selection Criteria:
Electrical specs have to match exactly. Voltage, amperage, RPM. Mounting configuration has to fit the existing bracket. Rotation and shaft dimensions must be right or the wheel won't fit or the air will blow the wrong direction. Starting components need to be compatible. And if there's an opportunity to step up to a higher-efficiency motor for energy savings, I'll present that option.
Phase 2: Motor Replacement Procedure (90-120 minutes)
1. System Preparation
Power isolation with lock-out/tag-out. Pull the blower assembly out for access. Protect surrounding components because a dropped blower wheel in a furnace can crack a heat exchanger. Organize tools and parts before I start.
2. Motor Removal and Installation
Wires get identified and disconnected. The blower wheel comes off the old motor shaft. New motor gets prepped with the mounting bracket and wired up. Wheel goes on the new shaft and gets balanced. A vibrating blower motor makes noise, wears bearings, and loosens connections. Nobody wants that.
Capacitor and Electrical Component Replacement
Capacitor Replacement Procedures
Capacitor Assessment and Replacement:
Capacitors are probably the most common component I replace. They’re cheap, they fail often in our heat, and a bad one can take out a compressor if you ignore it.
1. Capacitor Testing and Diagnosis
I measure actual capacitance against the rated value. Anything more than 5-6% off, it’s coming out. Visual check for bulging, leaking, or scorch marks. Continuity testing. And I correlate what I’m seeing with how the system is performing. A weak capacitor might still let the compressor start, but it’s working harder than it should and drawing more amps. That shortens compressor life.
2. Professional Replacement Procedure
Capacitor Replacement Protocol:
1. Power isolation and discharge procedures
2. Wire identification and documentation
3. Mounting hardware assessment and replacement
4. New capacitor specification verification
5. Proper electrical connections and termination
6. System testing and performance verification
Quick note: always discharge the old capacitor before handling it. They hold a charge even with power off. I use a resistor for controlled discharge. Shorting them with a screwdriver is asking for a spark and a bad day.
Safety Protocols and EPA Compliance
Refrigerant Handling and EPA Compliance
EPA Section 608 Compliance:
All refrigerant work has to comply with EPA regulations. Period. This isn’t optional and there are real fines for violations.
1. Refrigerant Recovery Requirements
I recover refrigerant to EPA-mandated levels using certified recovery equipment. Refrigerant goes into DOT-approved cylinders and gets properly stored or sent for recycling. I keep detailed records because the EPA can ask for them.
2. System Opening Procedures
Before opening any part of a refrigerant system, I verify recovery is complete and the system is at zero pressure. Then I work quickly to minimize moisture entry and seal anything I’m not actively working on. Components get protected throughout the process.
Electrical Safety Protocols
High-Voltage Safety Procedures:
Lock-out/tag-out on every job. No exceptions. I verify de-energized condition with a meter before touching anything. Proper PPE for electrical work. GFCI protection on all power tools. This stuff sounds basic but I know techs who’ve been badly shocked because they got comfortable and skipped a step.
Gas Appliance Safety
Natural Gas Safety Procedures:
Gas work makes me extra careful. A refrigerant leak wastes money. A gas leak can kill someone. Gas supply gets shut off and locked before I start. Every connection gets leak-tested with electronic detection when I’m done. Combustion analysis confirms the burner is operating safely. And I know the emergency procedures if something goes wrong.
Quality Control and Testing Procedures
Post-Replacement Testing Protocol
Complete System Testing:
1. Safety Testing
Electrical grounding and insulation resistance. Gas leak testing and combustion analysis on furnace work. Refrigerant leak testing and charge verification on cooling work. Every safety control tested to confirm it’ll actually shut the system down when it needs to.
2. Performance Testing
I test capacity to make sure the system is actually producing the BTUs it’s rated for. Efficiency measurements. All operating modes get cycled through. And I listen. Noise and vibration tell you a lot about installation quality. A quiet system is usually a well-installed system.
Documentation and Warranty
Service Documentation:
Every job gets documented. Replacement part specs and model numbers. What procedures were performed. All test results. Warranty information for parts and labor. This isn’t just paperwork for paperwork’s sake. When a customer calls in two years asking about their warranty, I can pull up exactly what was done and when.
Cost Analysis and Customer Communication
Component Replacement Cost Analysis
Cost Factors:
The part itself is just one piece of the cost. Labor varies based on difficulty and time. There are almost always ancillary components that should come along for the ride. And sometimes while I’m in there, I can make performance improvements that save the homeowner money on energy bills going forward. I try to break all of that down clearly so there are no surprises on the invoice.
Replacement vs. System Replacement Analysis
Decision Factors:
Replacement Decision Matrix:
- System age and overall condition
- Cost of repair vs. replacement value
- Energy efficiency improvements available
- Reliability and warranty considerations
- Customer budget and preferences
My general rule of thumb: if the system is under 10-12 years old and the rest of the components are healthy, repair usually makes sense. If you’re looking at a $3,000 repair on a 16-year-old system, we should probably talk about replacement. I’ll always give you both options with honest numbers.
Customer Communication Best Practices
Technical Translation:
Most homeowners don’t know what a TXV does, and they shouldn’t have to. When I explain what’s wrong, I use plain language. “Your compressor burned out because the capacitor was weak and making it work too hard.” Not “thermal overload due to elevated locked rotor amperage from deteriorated start/run capacitance.” Same diagnosis, different delivery. I lay out repair options with real pros and cons, not just the most expensive fix. And I explain what warranty coverage comes with the work so people know they’re protected.
Professional Development and Training
Advanced Component Replacement Training
Professional Skills Required:
EPA Universal certification is mandatory for any refrigerant work. Solid electrical knowledge because HVAC is as much electrical as it is mechanical. Brazing skills that take real practice to develop. System-level understanding so you can see how one component affects everything else. And safety training that you actually follow, not just sit through.
Continuing Education:
Manufacturer training keeps you current on new equipment. Building codes update regularly. New refrigerants and components come out. Safety standards evolve. I stay on top of all of it because this industry changes fast, and the guys who stop learning start making mistakes.
Frequently Asked Questions
Q: How long does major component replacement typically take? A: It takes as long as it takes to do it right. That said, compressors typically run 6-10 hours when you include system cleaning. Heat exchangers need 8-12 hours because the safety testing is critical. Evaporator coils take 6-8 hours, partly because access is often a nightmare in North Texas attics. Motor replacements are 2-4 hours with proper balancing. Tight spaces or complicated systems add time, but rushing guarantees problems.
Q: What components should be replaced together with a compressor? A: Both filter-driers. Always. Liquid line and suction line. Expansion device gets inspected and usually replaced. Accumulator or receiver-drier usually needs to go too. Contamination from the failed compressor gets into everything, and these parts trap it. Skipping them to save a few hundred bucks is why so many compressor replacements fail a second time. I won’t do it.
Q: When is component replacement preferable to system replacement? A: If your system is less than 10-12 years old, the other major components look healthy, and the total repair costs are under 50% of what a new system would cost. But I also factor in your plans. If you’re selling the house next year, a repair might make sense even on an older system. If you’re staying put for 15 years, sometimes replacing a major component in a 14-year-old system just delays the inevitable.
Q: What warranty coverage comes with professional component replacement? A: Parts carry the manufacturer warranty, which ranges from 1 to 10 years depending on the component and brand. We add our own labor warranty, typically 1-2 years on workmanship. The big thing is that professional installation keeps the manufacturer warranty valid. Improper installation voids it, and I’ve seen homeowners find that out the hard way.
Q: How do I know if a component needs replacement vs. repair? A: Some things are clear-cut. Cracked heat exchangers get replaced. Safety issue, no discussion. For other components, I evaluate condition, repair cost versus replacement cost, how reliable the repair will be, and what’s going on with the rest of the system. If a motor bearing is going bad in a 6-year-old air handler, I’m replacing the motor. If the same motor is in a 17-year-old unit, we might be talking about a new air handler.
Q: What safety considerations are most important during component replacement? A: Electrical safety tops the list. Lock-out/tag-out, every time, no exceptions. Then EPA-compliant refrigerant handling. On gas equipment, leak testing and combustion analysis. And proper installation procedures in general. Corners cut on safety lead to dangerous situations. I’ve heard stories about techs getting hurt because they were in a rush. Not worth it.
Take Action: Schedule Professional Component Service
If your system needs component work, get it done right the first time. It’s always cheaper than doing it twice.
Ready for component replacement that actually lasts? Call (940) 390-5676 for professional diagnosis and replacement. Or schedule your assessment at jupitairhvac.com/contact. We warranty our work and we stand behind it.
Professional Component Service Coverage
Jupitair HVAC handles component replacement across North Texas. I’m EPA Universal certified for all refrigerant work. My procedures go beyond manufacturer minimums because our climate demands it. Parts and labor warranties come standard. And for emergency failures, I’m available 24/7 because a dead AC in July doesn’t wait until Monday.
Professional component replacement saves money. Not because the parts are cheaper. Because the job gets done once instead of twice, and the system actually runs the way it should afterward. That’s what you get with proper procedures, proper training, and a tech who won’t skip steps.
Jupitair HVAC - Your North Texas component replacement specialists since 2008. Licensed & Insured.
Related Resources
Looking for more information? Check out these helpful resources:
- View All HVAC Services - Complete list of our residential and commercial services
- Service Areas - We serve Frisco, Plano, McKinney, Allen, and surrounding areas
- Emergency Service - Available 24/7 for urgent HVAC needs
- Maintenance Plans - Keep your system running efficiently year-round
- HVAC Blog - Expert tips and advice for North Texas homeowners
Sources & References
The component replacement procedures and safety standards in this article are based on the following authoritative sources:
- EPA Section 608 - Refrigerant Regulations - Refrigerant handling and certification requirements
- U.S. Department of Energy - HVAC Systems - Equipment efficiency standards
- ASHRAE Standards - HVAC technical standards
- ACCA - Quality Installation - Installation standards and procedures
- AHRI - Equipment Certification - Equipment performance ratings
- OSHA - Electrical Safety - Workplace electrical safety standards
- Texas Department of Licensing - HVAC - State contractor licensing
Last Updated: January 2026
Need Professional HVAC Service?
Our certified technicians are ready to help with any HVAC needs in North Texas