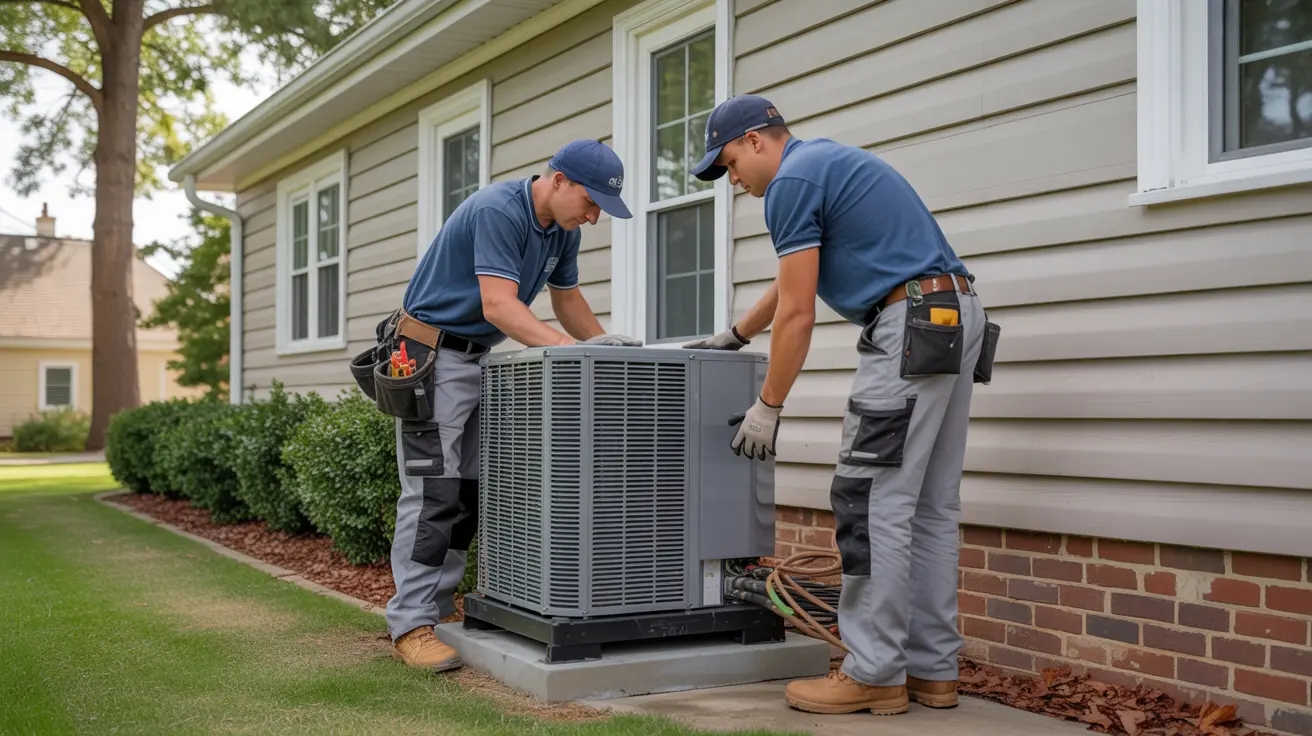
HVAC Component Replacement Procedures
Comprehensive guide to HVAC component replacement procedures for North Texas conditions. Professional techniques for replacing major system components with safety, efficiency, and longevity.
- The Critical Importance of Proper Component Replacement
- Understanding Component Failure Patterns in North Texas
- Compressor Replacement Procedures
- Professional Compressor Replacement Procedure
- Heat Exchanger Replacement Procedures
- Professional Heat Exchanger Replacement
- Evaporator Coil Replacement Procedures
- Professional Evaporator Coil Replacement
+ 16 more sections below...
Professional HVAC component replacement in North Texas costs $200-$5,000 depending on the component, with compressor replacement requiring 6-10 hours including mandatory system flushing, filter-drier replacement, and contamination testing. 60% of compressor replacements fail within 2 years because contractors skip critical steps—no oil analysis, no acid testing, no nitrogen purging. North Texas’s extreme climate causes component failures 40% more frequently than moderate climates due to thermal stress, electrical grid instability, and marathon 12-16 hour daily runtime. Always replace filter-driers with compressor work; skipping this “extra” step guarantees premature failure from system contamination.
The Critical Importance of Proper Component Replacement
Devastating Component Replacement Horror Story: The Johnson family in Plano faced a nightmare when their AC compressor failed during a 105°F July heat wave. A “discount” contractor offered to replace it for $800 less than professional quotes.
The disaster that followed was predictable and expensive: New compressor failed within 6 weeks due to contaminated refrigerant lines. Second compressor replacement cost them an additional $4,200. Refrigerant line contamination required complete system flush and component replacement. Three weeks without AC during the hottest summer on record. Total cost spiraled to $8,900 instead of the original $3,800 professional estimate.
The shocking truth: The “cheap” contractor skipped critical procedures—no system flushing, no filter-drier replacement, no contamination testing. They literally installed a new compressor into a contaminated system, guaranteeing failure.
Professional component replacement transforms disasters into success stories:
Complete contamination analysis prevents repeat failures by identifying and eliminating the root causes that destroyed the original component. Proper installation procedures ensure components last their full design life by following manufacturer specifications and industry best practices exactly. EPA-compliant refrigerant handling protects both equipment and environment while ensuring warranty coverage remains valid. Comprehensive testing verifies proper operation before technicians leave, proving the repair is complete and the system operates at peak efficiency.
Here’s what makes North Texas brutal for HVAC components: Our extreme climate causes failures 40% more frequently than moderate climates. Professional replacement procedures aren’t optional—they’re the difference between reliable operation and expensive disasters.
Understanding Component Failure Patterns in North Texas
How North Texas Climate Destroys HVAC Components:
After 15+ years of component replacement across North Texas, here’s what I see killing equipment:
Thermal stress destruction occurs when daily temperature swings of 30-40°F cause metal fatigue, cracked heat exchangers, and failed joints as components expand and contract constantly. Electrical grid nightmares in Texas mean power fluctuations fry motors, capacitors, and control boards faster than in more stable electrical environments. Corrosion acceleration results from our humidity combined with temperature cycling, creating perfect conditions for rapid component deterioration. Marathon runtime wear develops when systems run 12-16 hours daily for months, wearing out components that should last 15 years in half that time. Weather warfare includes hail damage, wind damage, and power surges that create emergency replacement situations demanding every professional skill.
What Makes Component Replacements Last in North Texas:
Reality-based quality standards recognize that manufacturer specs are minimum requirements, while North Texas’s extreme conditions demand premium components and installation practices that exceed basic standards. Bulletproof installation techniques follow rigorous procedures that prevent the premature failures caused by sloppy work and shortcuts. Perfect system integration ensures new components work harmoniously with existing equipment, preventing compatibility issues that cause rapid failure. Future-proof protection installs components with extra protection against our brutal environmental conditions, extending service life beyond typical expectations.
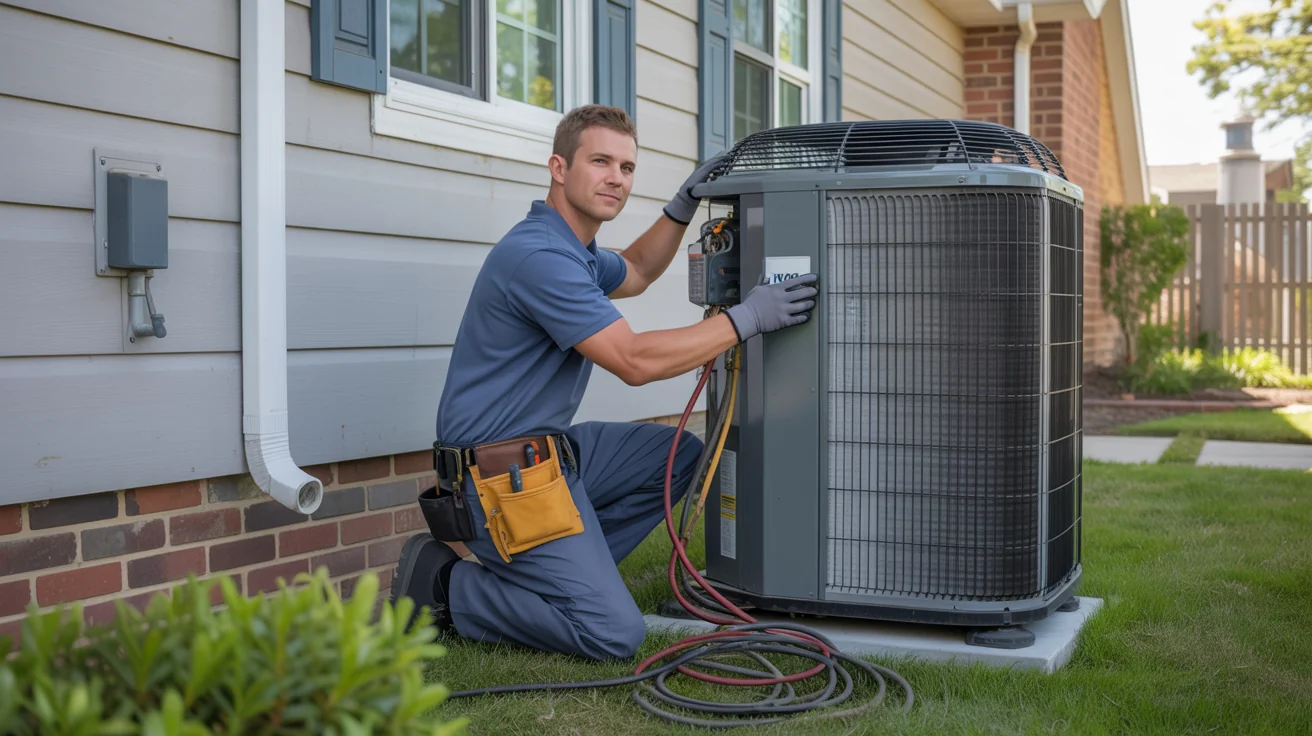
Compressor Replacement Procedures
Compressor Failure Analysis and Replacement Planning
Why Most Compressor Replacements Fail Again:
Here’s the brutal truth: 60% of compressor replacements fail within 2 years because contractors skip the detective work. I never install a compressor without understanding exactly why the first one died.
1. Failure Mode Investigation (My Detective Process)
Electrical failure forensics determine if winding failure, capacitor problems, or voltage issues killed the compressor, preventing the same electrical problem from destroying the replacement. Mechanical failure analysis examines internal damage to understand whether lubrication failure, refrigerant flood-back, or bearing wear caused the failure. Contamination analysis reveals how failed compressors contaminate the entire system with acids, metal particles, and degraded oil that will destroy replacement components. Root cause determination ensures understanding of WHY the compressor failed, because without this knowledge, you’re just installing another expensive victim for the same underlying problem.
2. System Contamination Assessment (The Critical Step Most Skip)
This is where I separate professional replacement from expensive disasters:
My Contamination Analysis Protocol:
1. Oil analysis reveals contamination type and severity
2. Acid test kits show if the system is "poisoned" with acids
3. Moisture testing determines if the system needs deep dehydration
4. Filter-drier condition shows how well the system was protected
5. System flushing requirements based on contamination levels
I’ve found systems so contaminated that installing a new compressor without complete cleanup would guarantee failure within weeks.
Professional Compressor Replacement Procedure
Phase 1: System Preparation and Safety (45-60 minutes)
1. Complete System Lockdown (No Shortcuts, No Exceptions)
Safety isn’t negotiable when you’re working with high-pressure refrigerant systems:
Electrical isolation: i use proper lock-out/tag-out at both the main panel and equipment disconnect—no “just flipping the switch”. Refrigerant recovery: complete epa-compliant recovery to legal levels, not “good enough” levels. Pressure verification: i verify zero pressure throughout the entire system before opening any connections. Safety confirmation: every safety protocol verified before any work begins.
2. System Assessment and Planning (The Foundation of Success)
Access strategy: i evaluate equipment access and rigging needs—some compressors require crane removal. Component compatibility verification: new compressor specs must exactly match system requirements—close isn’t good enough. Supporting component assessment: i determine what else needs replacement—filter-driers, expansion devices, contactors. Installation planning: i organize tools, materials, and procedures for efficient, professional work.
Phase 2: Compressor Removal (60-90 minutes)
1. Refrigerant Line Disconnection (Precision Surgical Work)
This isn’t demolition—it’s precision work that affects the entire replacement:
Line size verification: i confirm proper line sizes for the new compressor—mismatched lines kill performance. Clean cutting procedures: surgical cuts that prevent contamination entry into the system. Immediate end sealing: open refrigerant lines get sealed immediately to prevent moisture and contamination entry. Component tagging system: every connection gets labeled—reassembly mistakes cause expensive callbacks.
2. Electrical Disconnection (Documentation is Everything)
Wire identification system: i label every electrical connection—guessing during reassembly destroys compressors. Photo documentation: pictures of every electrical connection before removal—memory isn’t reliable under pressure. Conduit condition assessment: i inspect all electrical conduit and connections for heat damage or corrosion. Grounding verification: proper grounding protects the new compressor from electrical damage.
3. Mechanical Removal Mounting assessment: inspect compressor mounting and isolation. Rigging procedures: safe lifting and removal techniques. Workspace preparation: clear area for new compressor installation. Component inspection: assess mounting hardware condition.
Phase 3: System Cleaning and Preparation (90-120 minutes)
1. System Flushing Procedures (The Make-or-Break Step)
This is where professional replacement separates from amateur work:
My System Decontamination Protocol:
1. High-pressure nitrogen purging removes all contamination and debris
2. Complete filter-drier replacement (liquid line AND suction line)
3. Acid neutralization treatment if contamination testing shows problems
4. Multiple nitrogen purges until the system is surgically clean
5. Deep vacuum testing verifies system integrity and cleanliness
I’ve seen contractors skip this step to save time, only to have the replacement compressor fail within months.
2. Supporting Component Assessment (What Else Must Be Replaced)
Filter-drier replacement: always replaced during compressor work—no exceptions, no shortcuts. Expansion device inspection: txv or orifice tubes often need replacement after compressor failure. Accumulator/receiver evaluation: these components trap contamination and usually need replacement. Heat pump reversing valve service: often damaged by the same conditions that killed the compressor.
Phase 4: New Compressor Installation (120-180 minutes)
1. Compressor Preparation (Getting Ready for Success)
Every detail matters when you’re installing a $2,000-4,000 component:
Specification verification: i confirm exact replacement specs—model numbers, electrical ratings, mounting dimensions. Oil charge verification: proper oil type and quantity for your specific system—wrong oil kills compressors. Electrical terminal preparation: clean terminals and proper protection prevent electrical failures. Mounting system preparation: new isolation pads and hardware prevent vibration damage.
2. Installation Procedures (Where Precision Meets Experience)
Mounting installation: perfect alignment, proper isolation, and secure mounting prevent future problems. Refrigerant line brazing: professional silver-bearing brazing alloys with nitrogen purge protection. Electrical connections: proper termination, weather protection, and electrical code compliance. System integration: ensuring the new compressor works perfectly with all existing components.
3. Brazing and Connection Procedures (The Art of Permanent Connections)
This is where experience and training separate professionals from pretenders:
My Professional Brazing Standards:
1. Continuous nitrogen purging prevents internal oxidation and contamination
2. Silver-bearing brazing alloys designed specifically for refrigerant systems
3. Precise heat control prevents component damage and ensures proper joint strength
4. Every joint gets visual inspection and electronic leak testing
5. Surgical cleanliness maintained throughout the entire process
I’ve repaired too many systems damaged by poor brazing techniques—there are no shortcuts to proper connections.
Phase 5: System Commissioning (90-120 minutes)
1. Leak Testing and Evacuation (Proving the Work)
This is where we prove everything was done right:
Pressure testing: i pressure test to manufacturer specifications—not “close enough” pressures. Electronic leak detection: every joint, connection, and component gets checked for leaks. Deep evacuation: i pull a deep vacuum to remove all moisture and non-condensable gases. Vacuum hold test: the system must hold vacuum—if it doesn’t, there’s a leak to find and fix.
2. Refrigerant Charging (The Final Critical Step)
Precise charge calculation: exact refrigerant charge based on system capacity, line lengths, and operating conditions. Professional charging techniques: proper charging methods for your specific system type and refrigerant. Performance verification: complete system testing to verify proper operation under all conditions. Complete documentation: detailed records of all work performed, including before/after performance measurements.
Heat Exchanger Replacement Procedures
Heat Exchanger Assessment and Replacement Planning
Furnace Heat Exchanger Replacement:
1. Heat Exchanger Failure Verification Visual inspection: crack detection and integrity assessment. Combustion testing: co production and draft verification. Pressure testing: heat exchanger integrity under operating pressure. Thermal imaging: hot spot detection indicating heat exchanger problems.
2. Replacement vs. Unit Replacement Decision
Heat Exchanger Replacement Analysis:
Unit age and condition assessment evaluates the overall furnace condition to determine if heat exchanger replacement is cost-effective or if complete unit replacement makes more sense. Cost comparison of repair vs. replacement analyzes the financial impact of heat exchanger replacement versus new [furnace installation](/services/furnace-installation/), including labor and component costs. [Energy efficiency](/blog/energy-efficient-hvac-systems-north-texas/) considerations compare current unit efficiency with modern high-efficiency options available through complete [system replacement](/services/ac-installation/). Warranty and reliability factors assess remaining component life and manufacturer warranty coverage that affects long-term system reliability. Customer budget and preference evaluation considers financial constraints and comfort priorities to guide decision-making between repair and replacement options.
Professional Heat Exchanger Replacement
Phase 1: System Disassembly (120-180 minutes)
1. Complete System Shutdown Gas supply isolation: shut off and lock gas supply. Electrical disconnection: power isolation and lock-out procedures. Venting disconnection: safe venting system disconnection. Access preparation: remove cabinets and access panels.
2. Component Removal Burner assembly removal: complete burner and manifold removal. Blower assembly access: access to heat exchanger connections. Control system disconnection: remove control connections as needed. Heat exchanger extraction: safe removal of damaged heat exchanger.
Phase 2: New Heat Exchanger Installation (180-240 minutes)
1. Installation Preparation Specification verification: exact replacement part confirmation. Fitment verification: proper fit and alignment confirmation. Gasket and seal replacement: all sealing components replacement. Mounting hardware assessment: hardware condition and replacement.
2. Assembly Procedures Heat exchanger installation: proper positioning and securing. Burner reassembly: proper burner alignment and connection. Venting reconnection: proper venting system reconnection. Control system restoration: all control connections restoration.
Phase 3: System Commissioning and Testing (90-120 minutes)
1. Safety and Performance Testing Gas leak testing: complete gas system leak testing. Combustion analysis: proper combustion and efficiency verification. Heat exchanger testing: temperature and performance verification. Safety control testing: all safety systems verification.
Evaporator Coil Replacement Procedures
Evaporator Coil Assessment and Replacement
Coil Failure Analysis: Leak detection: identifying refrigerant leaks in evaporator coil. Contamination assessment: biological or chemical contamination evaluation. Airflow restriction: coil blockage and cleaning feasibility. System compatibility: new coil compatibility with existing system.
Professional Evaporator Coil Replacement
Phase 1: System Access and Preparation (60-90 minutes)
1. System Shutdown and Recovery Refrigerant recovery: complete epa-compliant recovery. Electrical isolation: power shutdown and isolation. Access creation: air handler or furnace disassembly for coil access. Workspace preparation: protect surrounding areas from contamination.
2. Coil Removal Procedures Refrigerant line disconnection: proper cutting and sealing procedures. Condensate disconnection: drain pan and line disconnection. Coil extraction: safe removal without damage to surrounding components. Contamination control: prevent spread of biological contamination.
Phase 2: New Coil Installation (120-180 minutes)
1. Installation Preparation Coil specification verification: exact replacement confirmation. Drain pan assessment: drain pan condition and replacement needs. Insulation replacement: all insulation restoration or replacement. Access panel preparation: panel modifications for proper fit.
2. Installation Procedures Coil positioning: proper alignment and support installation. Refrigerant connections: professional brazing with nitrogen purge. Condensate connection: proper drain connection and testing. Insulation installation: complete thermal barrier restoration.
Electrical Component Replacement Procedures
Motor Replacement Procedures
Blower Motor Replacement:
Phase 1: Motor Assessment and Selection (30-45 minutes)
1. Motor Specification Documentation Nameplate information: voltage, amperage, rpm, and rotation specs. Mounting specs: frame size, mounting holes, and shaft dimensions. Electrical needs: starting components and wiring needs. Performance needs: cfm and static pressure needs.
2. Replacement Motor Selection
Motor Selection Criteria:
Exact electrical specs match ensures proper voltage, amperage, and RPM specifications for safe and efficient motor operation. Proper mounting configuration requires correct frame size, mounting holes, and shaft dimensions for proper installation and alignment. Correct rotation and shaft specs must match original motor specifications to ensure proper fan operation and airflow direction. Starting component compatibility ensures capacitors and other starting components work properly with the replacement motor. Efficiency considerations for [energy savings](/blog/seasonal-hvac-energy-saving-strategies-north-texas-year-round-guide/) evaluate higher-efficiency motors that can reduce operating costs while maintaining proper system performance.
Phase 2: Motor Replacement Procedure (90-120 minutes)
1. System Preparation Power isolation: complete electrical isolation and lock-out. Access preparation: remove blower assembly for motor access. Component protection: protect surrounding components during work. Tool and material preparation: organize all necessary tools and materials.
2. Motor Removal and Installation Electrical disconnection: proper wire identification and removal. Mechanical removal: wheel and motor removal procedures. New motor preparation: mounting and electrical preparation. Installation procedures: proper mounting, balancing, and electrical connection.
Capacitor and Electrical Component Replacement
Capacitor Replacement Procedures
Capacitor Assessment and Replacement:
1. Capacitor Testing and Diagnosis Capacitance measurement: actual vs. rated capacitance verification. Visual inspection: physical damage, bulging, or leakage assessment. Electrical testing: ohm and continuity testing procedures. Performance correlation: capacitor condition vs. system performance.
2. Professional Replacement Procedure
Capacitor Replacement Protocol:
1. Power isolation and discharge procedures
2. Wire identification and documentation
3. Mounting hardware assessment and replacement
4. New capacitor specification verification
5. Proper electrical connections and termination
6. System testing and performance verification
Safety Protocols and EPA Compliance
Refrigerant Handling and EPA Compliance
EPA Section 608 Compliance: All refrigerant work must comply with EPA regulations for refrigerant recovery, recycling, and reclamation.
1. Refrigerant Recovery Requirements Complete recovery: recover refrigerant to epa-mandated levels. Recovery equipment: use epa-certified recovery equipment. Refrigerant storage: proper storage in dot-approved cylinders. Documentation: maintain required recovery and disposal records.
2. System Opening Procedures Recovery verification: verify complete refrigerant recovery. Pressure relief: ensure zero system pressure before opening. Contamination prevention: prevent moisture and air entry. Component protection: protect system components during service.
Electrical Safety Protocols
High-Voltage Safety Procedures: Lock-out/tag-out: proper electrical isolation procedures. Voltage verification: verify de-energized condition before work. Personal protection: proper ppe for electrical work. Ground fault protection: gfci protection for all tools and equipment.
Gas Appliance Safety
Natural Gas Safety Procedures: Gas isolation: proper gas supply shutdown and isolation. Leak testing: electronic leak detection throughout work. Combustion testing: proper combustion verification after service. Emergency procedures: gas emergency response protocols.
Quality Control and Testing Procedures
Post-Replacement Testing Protocol
Comprehensive System Testing:
1. Safety Testing Electrical safety: proper grounding and insulation testing. Gas safety: leak testing and combustion analysis. Refrigerant safety: leak testing and proper charging verification. Operational safety: all safety controls verification.
2. Performance Testing Capacity testing: system capacity verification and optimization. Efficiency testing: energy efficiency measurement and verification. Operational testing: all modes and controls verification. Noise and vibration: proper operation without excessive noise.
Documentation and Warranty
Service Documentation: Component specs: complete replacement part documentation. Installation procedures: documentation of all procedures performed. Testing results: all testing and verification results. Warranty information: parts and labor warranty documentation.
Cost Analysis and Customer Communication
Component Replacement Cost Analysis
Cost Factors: Component costs: replacement part costs and availability. Labor needs: time and skill level required for replacement. Ancillary components: additional components requiring replacement. System optimization: performance improvements and efficiency gains.
Replacement vs. System Replacement Analysis
Decision Factors:
Replacement Decision Matrix:
- System age and overall condition
- Cost of repair vs. replacement value
- Energy efficiency improvements available
- Reliability and warranty considerations
- Customer budget and preferences
Customer Communication Best Practices
Technical Translation: Problem explanation: clear explanation of component failure and causes. Repair options: multiple options with pros, cons, and costs. Value proposition: benefits of professional replacement procedures. Warranty protection: coverage provided with professional replacement.
Professional Development and Training
Advanced Component Replacement Training
Professional Skills Required: EPA Universal certification: required for all refrigerant work. Electrical knowledge: understanding of electrical systems and safety. Brazing skills: professional brazing techniques and materials. System knowledge: understanding of system integration and operation. Safety training: comprehensive safety protocols and procedures.
Continuing Education: Manufacturer training: brand-specific procedures and techniques. Code updates: current electrical and mechanical codes. New technology: advanced components and installation techniques. Safety updates: current safety standards and procedures.
Frequently Asked Questions
Q: How long does major component replacement typically take? A: Professional component replacement takes time because shortcuts cause failures. Compressors require 6-10 hours (including proper system cleaning), heat exchangers need 8-12 hours (safety testing is critical), evaporator coils take 6-8 hours (access is often challenging), and motors need 2-4 hours (including proper balancing). Difficult access or complex systems extend these times, but rushing guarantees problems.
Q: What components should be replaced together with a compressor? A: Professional compressor replacement ALWAYS includes both filter-driers (liquid and suction line), expansion device inspection and often replacement, and usually accumulator/receiver replacement. System contamination from the failed compressor often requires additional components. Skipping these “extras” is why so many compressor replacements fail again.
Q: When is component replacement preferable to system replacement? A: Component replacement makes sense when the system is less than 10-12 years old, other major components are healthy, and total repair costs are less than 50% of replacement value. However, I always consider the customer’s long-term plans, energy efficiency goals, and reliability needs. Sometimes replacing a major component in an aging system just delays the inevitable.
Q: What warranty coverage comes with professional component replacement? A: Professional replacement includes manufacturer parts warranty (1-10 years depending on the component) plus our labor warranty (typically 1-2 years on installation workmanship). The key difference is that professional installation ensures warranty coverage—improper installation voids manufacturer warranties.
Q: How do I know if a component needs replacement vs. repair? A: Professional diagnosis determines repair feasibility by evaluating component condition, cost-effectiveness of repair versus replacement, reliability expectations, and overall system health. Some components (like cracked heat exchangers) must be replaced for safety. Others can be repaired if it makes economic sense and provides reliable service.
Q: What safety considerations are most important during component replacement? A: Safety is non-negotiable during component replacement. Electrical safety (proper lock-out/tag-out procedures), refrigerant handling (EPA compliance and proper recovery), gas appliance safety (leak testing and combustion analysis), and proper installation procedures protect both technicians and homeowners. Corners cut on safety often lead to dangerous situations.
Take Action: Schedule Professional Component Service
Don’t gamble with expensive component replacement when professional service guarantees proper installation, safety compliance, and long-term reliability. The Johnson family’s story proves what happens when you choose price over professional expertise.
Ready for expert component replacement that lasts? Call (940) 390-5676 for professional component diagnosis and replacement. Schedule your assessment at jupitairhvac.com/contact. Ask about our comprehensive component replacement warranties and service packages. Get started with complete system evaluation and professional repair planning.
Professional Component Service Coverage
Jupitair HVAC delivers reliable component replacement throughout North Texas: EPA Universal certified technicians for all refrigerant system work. Professional installation procedures that exceed manufacturer specifications. Comprehensive warranties protecting your investment with parts and labor coverage. Emergency component replacement available 24/7 for critical system failures.
Professional component replacement saves money and prevents disasters. Specialized knowledge, proper procedures, and safety compliance aren’t optional—they’re the foundation of reliable service. Trust Jupitair HVAC’s certified technicians for component replacement that protects your investment and ensures long-term system performance.
Jupitair HVAC - Your North Texas component replacement specialists since 2008. Licensed & Insured.
Related Resources
Looking for more information? Check out these helpful resources:
- View All HVAC Services - Complete list of our residential and commercial services
- Service Areas - We serve Frisco, Plano, McKinney, Allen, and surrounding areas
- Emergency Service - Available 24/7 for urgent HVAC needs
- Maintenance Plans - Keep your system running efficiently year-round
- HVAC Blog - Expert tips and advice for North Texas homeowners
Sources & References
The component replacement procedures and safety standards in this article are based on the following authoritative sources:
- EPA Section 608 - Refrigerant Regulations - Refrigerant handling and certification requirements
- U.S. Department of Energy - HVAC Systems - Equipment efficiency standards
- ASHRAE Standards - HVAC technical standards
- ACCA - Quality Installation - Installation standards and procedures
- AHRI - Equipment Certification - Equipment performance ratings
- OSHA - Electrical Safety - Workplace electrical safety standards
- Texas Department of Licensing - HVAC - State contractor licensing
Last Updated: January 2026
Need Professional HVAC Service?
Our certified technicians are ready to help with any HVAC needs in North Texas