Frozen Evaporator Coil? Here's Exactly What to Do (2026 Guide)
HVAC tech explains how to fix a frozen evaporator coil step by step. DIY fixes, when to call a pro, real costs, and North Texas prevention tips.

- Step 1: Turn Off Your AC Right Now
- Step 2: Check Your Air Filter (the Fix 43% of the Time)
- Step 3: Open Every Vent in the House
- Step 4: Check Your Condensate Drain Line
- Step 5: Look for Signs of a Refrigerant Leak
- Step 6: Causes Only a Licensed Tech Can Diagnose
- Step 7: How to Thaw Your Frozen Coil Safely
- Step 8: What Happens When a Tech Shows Up
+ 3 more sections below...
Last July I pulled up to a house in Frisco. It was 105 degrees outside, and the homeowner met me at the door looking like she was about to cry. Her AC had been running for six hours straight.
The house was 84 degrees and climbing. Kids were camped in front of a box fan in the living room.
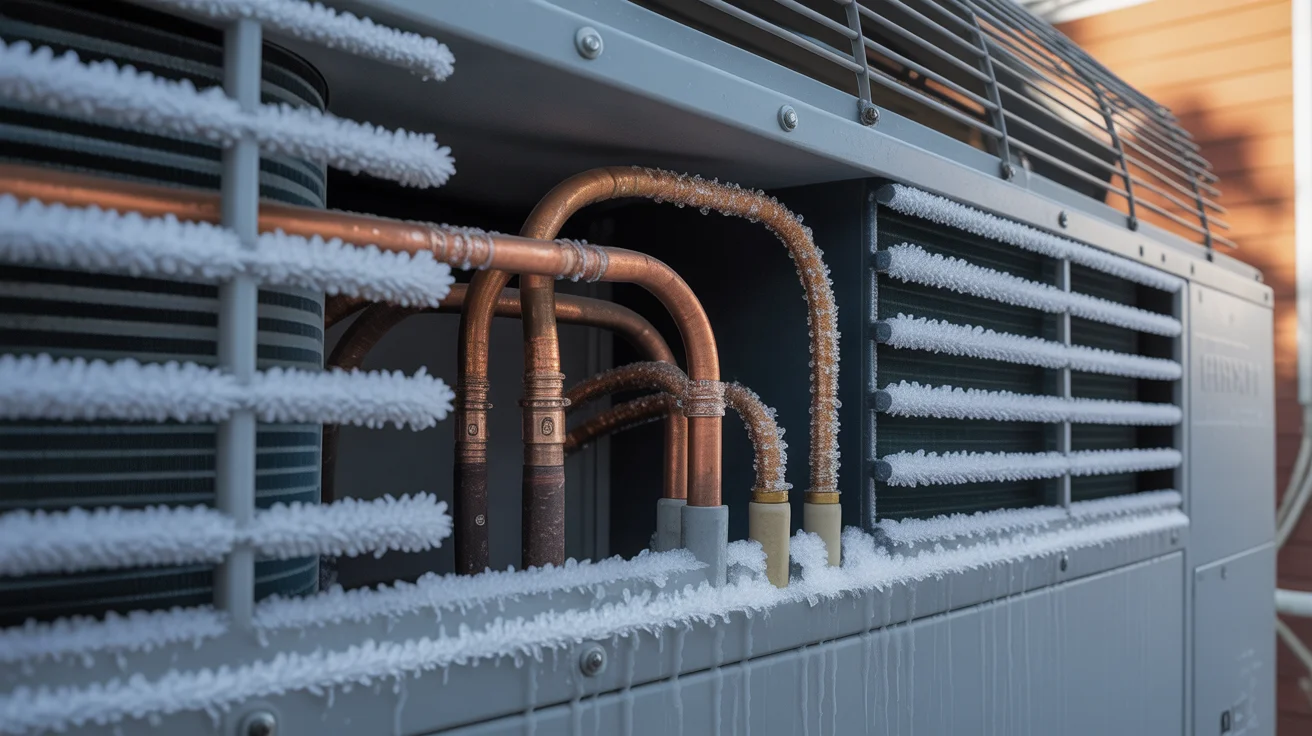
I asked her to walk me to the air handler. “Can you see the copper pipes coming out of the unit?” She pointed at them. They were covered in a solid sheet of ice. That’s a frozen evaporator coil, and in a North Texas summer, it’s one of the most common (and most stressful) AC failures I see.
Here’s the good news. We can fix this. About 43% of frozen coil calls I respond to in the Frisco, Plano, and McKinney area turn out to be a dirty air filter. A $15 fix.
But some causes need a licensed tech with gauges and experience. This guide walks you through the exact steps I follow on every frozen coil call, so you’ll know which camp you’re in before you spend a dime.
Step 1: Turn Off Your AC Right Now
Your first instinct is to turn the thermostat lower. I get it. The house is hot, the system isn’t cooling, so you want more cold air. But this is the worst thing you can do with ice on your evaporator coil.
Here’s what happens when you keep running an AC with a frozen coil. Liquid refrigerant backs up into the compressor. Your compressor is designed to compress gas only. Liquid doesn’t compress.
It breaks things. This is called liquid slugging, and it can destroy a compressor within minutes. Not hours. Minutes. A compressor replacement costs $1,000 to $3,500+. Turning off your thermostat costs nothing.
75% of HVAC emergencies in Texas happen during summer heatwaves, and frozen coils are one of the top causes. Don’t let a frozen coil become a dead compressor.
What to do instead:
- Turn your thermostat to OFF (not just up, completely off cooling mode)
- Switch the fan setting to ON (not AUTO). This pushes warm room air across the frozen coil and speeds up thawing
- Do not touch the temperature setting. Leave the system off.
The fan-only trick is the single most useful thing you can do right now. Warm air from your house (70-80 degrees) flowing across that ice block is exactly what the coil needs to start thawing safely.
Frozen coil in the middle of a Texas summer? Call (940) 390-5676. We respond within 2 hours for emergency AC repair.
Step 2: Check Your Air Filter (the Fix 43% of the Time)
Out of every ten frozen coil calls I run in North Texas, about four turn out to be nothing more than a clogged filter. That’s it. A $10 to $30 fix you can do right now without waiting for a tech.
Here’s the physics. Your evaporator coil normally runs at 40 to 50 degrees during active cooling. It sits about 18 to 22 degrees below your return air temperature. That’s cold, but it’s above freezing.
When a clogged filter chokes off airflow, warm air stops flowing across the coil. The refrigerant inside keeps pulling heat from a tiny pocket of air until the coil surface drops below 32 degrees. Moisture in the air freezes on contact. Ice builds on ice. Within a few hours, you’ve got a solid block.
In North Texas summers, your system runs 16+ hours per day. A filter that would be fine in a milder climate tips a Texas system into freeze territory because there’s almost no natural off-cycle recovery time.
Pull the filter right now. If it’s gray or brown and you can’t see light through it, that’s your problem. Replace it immediately.
North Texas filter schedule:
- June through September: change every 30 days, no exceptions
- Rest of the year: every 60 to 90 days
- MERV 8-11 recommended. MERV 13 and higher can restrict airflow on older systems and actually cause the same freezing problem you’re trying to prevent
Step 3: Open Every Vent in the House
“I closed the vents in the guest rooms to save energy.” I hear this from homeowners constantly. Sounds logical. It isn’t.
Closing supply vents doesn’t redirect cold air to other rooms. It restricts total system airflow, which is exactly what causes coils to freeze.
Blocked return vents are even worse. A couch pushed against a return grille, curtains draped over a wall vent, boxes stacked in front of a hallway return. A single blocked return grille can reduce system airflow by 30 to 40%. That’s enough to freeze a coil even with a clean filter.
Walk every room in your house right now:
- Open every supply vent fully, including rooms you don’t use
- Check the large return air grilles (usually in hallways or central areas). No furniture, curtains, or boxes blocking them
- Move anything within 12 inches of a return vent
I walked into a home in Plano last spring where the homeowner had closed 6 of 10 supply vents. System was starving for air. Opened the vents, ran the fan for four hours, and the ice was gone. No charge. Problem solved.
Step 4: Check Your Condensate Drain Line
When that ice block on your coil melts, it releases a lot of water. More than your drain line can handle if it’s even partially clogged with algae. This is where a frozen coil turns into a water damage problem.
If your air handler is in the attic, read this carefully. Attic-mounted units are extremely common in North Texas new construction. A large ice block melting rapidly can release several gallons of water in a short window. If the coil freezes and the drain line is slow, the thaw water overflows the drain pan into your attic insulation, wooden joists, and drywall ceiling.
I’ve seen homeowners in McKinney wake up to a water stain spreading across their bedroom ceiling because the coil froze overnight and the drain pan overflowed. That repair bill adds $500 to $2,000+ in drywall and insulation costs on top of the HVAC fix. Algae grows fast in North Texas humidity, so a line that was clear in April can be partially blocked by June. Completely preventable with a monthly vinegar flush during cooling season.
Put towels around the air handler base right now. If your unit is in the attic, check the ceiling below for any water spots or dripping.
Quick drain test:
- Find the white PVC pipe near your air handler
- Pour a cup of water into the drain pan
- If it doesn’t drain within a minute, the line is clogged
- Flush with a cup of white vinegar. Do this monthly during summer to prevent algae buildup.
Step 5: Look for Signs of a Refrigerant Leak
Here’s the pattern that tells me it’s not a filter problem. You thaw the coil. You change the filter. The system works great for two or three days. Then it freezes again.
You thaw it again. New filter again. Freezes again. That cycle means one thing. You have a refrigerant leak. Filter changes won’t fix it.
Refrigerant is a closed system. Your AC doesn’t “use up” refrigerant like a car uses gas. If the charge is low, the refrigerant is leaking out somewhere.
When the charge drops, pressure in the evaporator drops. The remaining refrigerant expands more than it should, the coil temperature crashes below 32 degrees, and you’re back to a block of ice.
What you can check without gauges:
- Ice concentrated on the copper refrigerant lines outside the air handler (not just on the coil)
- A hissing sound near the air handler or where refrigerant lines connect
- Oil stains around refrigerant line fittings (refrigerant oil seeps out at leak points)
- System runs but barely cools even with a fresh filter installed
Why homeowners get skeptical about this diagnosis. I understand the confusion. “You’re telling me my sealed system is leaking?” Yes. Microcracks from years of vibration, formicary corrosion from chemicals in building materials and furniture, or installation joints the installer didn’t braze properly.
Copper tubing develops pinhole leaks over time, especially in newer construction homes where formaldehyde off-gassing from building materials accelerates the corrosion.
The cost reality of R-410A. Wholesale R-410A refrigerant has risen from $8 to $12 per pound to $25 to $45 per pound thanks to the AIM Act phase-down. A recharge without finding and fixing the leak runs $200 to $500, and you’ll be paying that again next season. A proper leak detection ($130 to $300) plus repair ends the cycle for good.
If your coil keeps freezing after a filter change, you need a tech. Schedule AC repair today.
Step 6: Causes Only a Licensed Tech Can Diagnose
Four frozen coil causes require manifold gauges, amp clamps, and experience reading refrigerant pressures. These won’t show up on any DIY checklist. Here’s what I look for when the obvious causes are ruled out.
TXV (Expansion Valve) Failure
The TXV meters how much refrigerant enters your evaporator coil. When it fails, things go wrong fast.
- Stuck closed: Starves the coil of refrigerant. Very high superheat, low suction pressure. The coil freezes rapidly because the small amount of refrigerant that gets through over-expands.
- Stuck open: Floods the coil with liquid refrigerant. Low superheat. Risk of liquid slugging the compressor.
- Partial restriction: You’ll see uneven icing, one section frozen solid while the rest is clear.
TXV failure is one of the most commonly misdiagnosed problems in residential AC. A tech who doesn’t check both superheat and subcooling might call it “low refrigerant” and add charge. That won’t fix a restricted valve, and it wastes your money. TXV replacement runs $200 to $600.
Blower Motor Problems
Set the thermostat fan to ON. If the blower doesn’t spin but you hear a humming sound from the air handler, the problem is likely a failed run capacitor, about $150 to fix. Not the motor itself. The motor tries to start but can’t get going without the capacitor’s boost.
If the motor is actually dead, replacement runs $300 to $700 including parts and labor.
Oversized AC System
This one is common in North Texas new construction subdivisions where the builder’s contractor skipped the Manual J load calculation and just threw in the biggest unit that would fit.
A 5-ton system in a 2,800 square foot house cools the space too fast. It hits the thermostat setpoint in 8 to 10 minutes, shuts off, starts again, shuts off again. This short-cycling means the evaporator coil hits its coldest temperature every cycle but never runs long enough to stabilize. Over time, ice builds up.
Filter changes won’t fix an oversized system. The only real solution is a proper load calculation and correct sizing.
Dirty Coil (Not Just Dirty Filter)
Dust on the coil itself acts as a thermal blanket. Even with good airflow from a clean filter, the refrigerant can’t absorb heat through that insulating layer. The coil drops below 32 degrees and freezes.
- In-place professional cleaning: $100 to $400
- Remove-and-clean (heavy buildup): $400 to $700
Step 7: How to Thaw Your Frozen Coil Safely
You’ve turned off the AC and switched the fan to ON. Now you wait. Here’s how long.
- Fan-only mode: 3 to 4 hours for moderate ice buildup
- Fully frozen solid coil: up to 24 hours
- System off, no fan running: up to 24 hours
Do NOT use a hair dryer or heat gun. Rapidly heating copper tubing and aluminum fins that are below zero causes thermal shock. Micro-cracking in the coil. The fan-only method adds only 1 to 2 hours compared to a heat gun, and it doesn’t risk cracking a coil that costs over a thousand dollars to replace.
Do NOT chip the ice off. I’ve seen homeowners try to scrape ice off the coil with a screwdriver. This is how a $150 service call becomes a $1,500+ refrigerant leak repair. Copper tubing cracks easily when frozen.
During the thaw:
- Place towels around the air handler base and replace as they saturate
- If the unit is in the attic, check the drain pan every hour
- Let the ice melt completely before doing anything else
After the coil is fully thawed, restart the system in cooling mode and monitor for 30 minutes. If it cools normally, the problem was likely the filter. If it freezes again within 24 to 48 hours, there’s an underlying cause that needs a tech.
Step 8: What Happens When a Tech Shows Up
If you’ve never called an HVAC tech for a frozen coil, here’s what to expect. No surprises, no mystery.
First thing to know. A tech cannot diagnose a frozen coil while it’s still frozen. The ice blocks access to everything we need to measure. You can’t trust suction pressure readings through ice. You can’t inspect the coil visually. You can’t assess refrigerant levels accurately.
This is why scheduling a tech while the coil is still iced up won’t speed up the repair. Start the thaw process now, then call.
Here’s my diagnostic order on every frozen coil call:
- Confirm the system is off and the coil is thawing (or wait for full thaw)
- Check the filter and airflow first (cheapest fix rules out the most common cause)
- After full thaw, attach manifold gauges to the service ports
- Measure suction and discharge pressures with the system running
- Calculate superheat and subcooling
- High superheat + low suction = low refrigerant charge or restricted TXV
- Check blower motor amperage to verify adequate airflow
- If refrigerant is low, perform leak detection BEFORE adding refrigerant
- Present findings and repair options with costs before touching anything
What it costs:
- Diagnostic/service call fee: $75 to $200 (most companies apply this toward the repair)
- Emergency or after-hours visit: add $50 to $150+
Not sure if your situation is a DIY fix or a service call? Call us. We’ll walk you through it on the phone first. (940) 390-5676 or schedule AC repair online.
How Much Does It Cost to Fix a Frozen Evaporator Coil?
Nobody else publishes this information, so here it is. Every possible repair, from a $10 filter to a full system replacement.
| Repair | Cost Range |
|---|---|
| Air filter replacement (DIY) | $10 to $30 |
| Professional diagnostic/service call | $75 to $200 |
| Coil cleaning (in-place) | $100 to $400 |
| Blower motor capacitor | ~$150 |
| Refrigerant leak detection | $130 to $300 |
| R-410A recharge | $200 to $500 |
| R-22 recharge (legacy systems) | $180 to $600+ |
| Blower motor replacement | $300 to $700 |
| TXV replacement | $200 to $600 |
| Evaporator coil replacement | $627 to $2,700 (avg $1,350) |
| Compressor replacement (worst case) | $1,000 to $3,500+ |
| Full system replacement | $5,000 to $10,000 |
The Repair vs. Replace Math
Here’s the rule of thumb I give every homeowner. If the repair costs more than 30% of a full system replacement AND your system is 10+ years old, replacement is the smarter financial move. With a 3-ton system running $5,000 to $8,000 installed, that means any single repair over $1,500 to $2,400 on an aging system deserves a serious replacement conversation.
R-22 Systems: The Hard Truth
If your system uses R-22 refrigerant (most units installed before 2010), you’re facing a different calculation entirely. R-22 is no longer manufactured. Only reclaimed stock is available, at $90 to $150 per pound.
A single leak-and-recharge cycle can cost more than the system is worth. If you have an R-22 system with a refrigerant leak, it’s almost always time to replace.
Ready for a straight answer on your frozen coil? Call (940) 390-5676 or schedule a service call. We also offer annual maintenance plans that catch these problems before they become emergencies.
Step 9: How to Keep Your Coil From Freezing Again
An emergency frozen coil service call in July runs $200 to $800+, plus the stress of a hot house and the risk of compressor damage. An annual tune-up runs $80 to $150. Prevention wins by a factor of ten.
North Texas Prevention Calendar:
- March/April: Schedule a professional AC tune-up before the summer rush. This is when we check refrigerant levels, clean the coil, test the blower, and flush the drain line.
- May 1: Install a fresh filter. Set a monthly phone reminder.
- June through September: Change the filter every 30 days. Check the drain pan monthly for standing water. Pour a cup of vinegar into the drain line monthly to prevent algae buildup.
- October: End-of-season filter change.
- Year-round: Never close vents in unused rooms.
Most frozen coil emergency calls I respond to come from systems that haven’t been serviced in two or more years. 75% of HVAC emergencies happen during Texas summer heatwaves, and the majority involve systems with no recent maintenance. Texas HVAC emergency rates run approximately 30% higher than national averages because of the extreme climate load on equipment.
Read more about the best time to schedule AC maintenance to lock in early-season pricing.
FAQ: Frozen Evaporator Coil Questions
Can a frozen evaporator coil fix itself?
No. The ice melts when the system shuts off, but the underlying cause (dirty filter, low refrigerant, blower problem) doesn’t resolve itself. If you restart without addressing the root cause, the coil will freeze again. A frozen evaporator coil is a symptom, not the disease.
How long does it take to thaw a frozen evaporator coil?
With the fan set to ON (fan-only mode), 3 to 4 hours for moderate ice buildup. A fully frozen solid coil can take up to 24 hours. Do not use a hair dryer or heat gun. The risk of cracking the coil isn’t worth saving 2 hours.
Is a frozen evaporator coil dangerous?
Running the system with a frozen coil risks compressor damage ($1,000 to $3,500+) from liquid slugging. In a Texas summer, a dead AC also creates a genuine health risk. Indoor temperatures above 90 degrees can cause heat exhaustion within 2 to 4 hours for elderly family members, infants, and anyone with medical conditions.
Can I run my AC with a frozen coil?
No. Turn it off immediately. Liquid refrigerant entering the compressor causes catastrophic mechanical failure within minutes. A compressor costs thousands to replace. Turning off the thermostat takes five seconds.
Why does my evaporator coil keep freezing?
Repeat freezing after a filter change points to one of four causes: (1) a slow refrigerant leak losing charge gradually, (2) a failing blower motor not moving enough air, (3) a stuck or restricted TXV valve, or (4) an oversized AC system that short-cycles. All four require a licensed tech with manifold gauges. See the “Causes Only a Licensed Tech Can Diagnose” section above for the full breakdown.
Will a dirty filter cause my coil to freeze?
Yes. Dirty filters are the number one cause of frozen evaporator coils, accounting for about 43% of frozen coil calls in North Texas. The filter blocks airflow, the coil drops below 32 degrees, and moisture freezes on contact. Change your filter every 30 days during summer. Period.
Should I call an emergency HVAC tech for a frozen coil?
Call emergency service if the outdoor temperature is 90 degrees or higher and you have elderly family members, infants, or anyone with medical conditions in the home. If it’s a mild day (under 85 degrees) and everyone is healthy, you can safely thaw the coil overnight and schedule a morning appointment. Emergency service adds $50 to $150+ to the call. If you do need emergency help, call (940) 390-5676 and we’ll be there within 2 hours.
Need Professional HVAC Service?
Our certified technicians are ready to help with any HVAC needs in North Texas