Understanding Frozen Evaporator Coils: A Critical AC Problem
A frozen evaporator coil is one of the most common yet serious air conditioning problems North Texas homeowners face, especially during our scorching summers when your AC runs constantly. When ice forms on your evaporator coil, it creates a cascade of problems that can lead to complete system failure, water damage, and expensive repairs if not addressed promptly.
The evaporator coil, located in your indoor air handler or furnace, is responsible for absorbing heat from your home’s air. When operating correctly, it maintains a temperature just above freezing, allowing condensation to form and drain away. However, when something disrupts this delicate balance, the coil temperature drops below 32°F, causing moisture to freeze on the coil surfaces.
Why This Problem Demands Immediate Attention
In the Dallas-Fort Worth metroplex, where summer temperatures regularly exceed 100°F, a frozen evaporator coil doesn’t just mean discomfort—it can mean:
- Complete system shutdown within 24-48 hours
- Compressor damage costing $1,500-$3,000 to replace
- Water damage to ceilings, walls, and flooring
- Mold growth in your ductwork and air handler
- Energy bills increasing by 30-50% as the system struggles
Warning: Never Chip Ice Off Your Coil
Attempting to remove ice forcefully can puncture refrigerant lines or damage delicate aluminum fins, leading to costly repairs or refrigerant leaks. Always allow natural thawing.
Recognizing the Signs: Early Detection Saves Money
Visual Indicators
The most obvious sign is visible ice formation, but by the time you see ice, the problem has likely been developing for days or weeks. Look for:
- Ice on refrigerant lines - Copper lines running from your outdoor unit covered in frost
- Water puddles near your indoor unit or dripping from vents
- Frost on air registers in severe cases
- Condensation on ductwork or air handler cabinet
Performance Symptoms
Before ice becomes visible, your system will exhibit warning signs:
- Weak airflow from vents (50% reduction or more)
- Warm air blowing when AC is running
- Longer run times without reaching set temperature
- Unusual sounds like hissing, bubbling, or gurgling
- Higher humidity levels inside your home
- Thermostat not reaching setpoint despite continuous operation
The Ice Formation Timeline
Understanding how quickly ice forms helps you respond appropriately:
- Hour 1-2: Coil temperature drops below 32°F
- Hour 2-6: Thin frost layer forms on coil fins
- Hour 6-12: Ice bridges between fins, restricting airflow
- Hour 12-24: Solid ice block forms, completely blocking airflow
- Hour 24+: Ice expands to refrigerant lines and drain pan
Root Causes: Why Evaporator Coils Freeze
1. Airflow Restrictions (65% of Cases)
Insufficient airflow is the leading cause of frozen coils in North Texas homes. When airflow drops below 400 CFM per ton of cooling, the coil can’t absorb enough heat to stay above freezing.
Common airflow restrictors:
- Dirty air filters - Should be changed every 30-90 days
- Blocked return vents - Furniture, drapes, or rugs covering vents
- Closed supply registers - More than 20% of vents closed
- Collapsed ductwork - Flex duct sagging or crushed
- Dirty evaporator coil - Dust and debris insulating the coil
- Failing blower motor - Reduced speed due to capacitor or motor issues
- Undersized ductwork - Common in older North Texas homes
2. Refrigerant Issues (25% of Cases)
Low refrigerant levels cause the remaining refrigerant to expand more than designed, dropping coil temperature below freezing.
Refrigerant problem indicators:
- Hissing or bubbling sounds from indoor unit
- Inconsistent cooling throughout your home
- Higher electric bills with less cooling
- Ice forming on outdoor unit copper lines first
- Oil stains near connections indicating leaks
Common leak locations in North Texas:
- Evaporator coil (formicary corrosion from humidity)
- Service valves (vibration from constant summer operation)
- Filter drier (age-related deterioration)
- Indoor coil connections (poor installation or age)
3. Mechanical Failures (8% of Cases)
Component failures can trigger freezing even in well-maintained systems:
- Blower motor failure - Bearings worn from dust and heat
- Capacitor weakness - Reduced motor speed
- Control board malfunctions - Incorrect fan speed signals
- Expansion valve stuck - Over-feeding refrigerant to coil
- Dirty outdoor coil - Causing high head pressure
4. Environmental Factors (2% of Cases)
North Texas weather patterns can contribute:
- Running AC below 60°F outdoor temperature
- Extreme temperature swings (common in spring/fall)
- High indoor humidity from cooking, showers, or leaks
- Inadequate insulation causing excessive heat load
Safe Thawing Procedures: Step-by-Step Guide
⚡ Safety First: Electrical Hazards
Water and electricity create deadly combinations. Before any thawing procedure:
- ✓ Turn off AC at thermostat AND circuit breaker
- ✓ Never touch electrical components with wet hands
- ✓ Place towels/buckets to catch melting ice
- ✓ If water is near electrical components, call a professional immediately
Method 1: Natural Thawing (Safest Option)
Time Required: 4-24 hours depending on ice thickness
-
Turn off your AC system completely
- Set thermostat to “OFF” (not just higher temperature)
- Switch breaker to OFF position
- This prevents compressor damage from liquid refrigerant
-
Switch fan to “ON” position
- Only if no water near electrical components
- Circulates warm air over frozen coil
- Speeds thawing from 24 to 4-8 hours
-
Prepare for water drainage
- Place towels around air handler
- Position buckets under drain line
- Check drain pan isn’t cracked
- Monitor every 30 minutes initially
-
Open all supply vents
- Remove any obstructions
- Ensure maximum airflow
- Check return grilles are clear
-
Monitor the thawing process
- Check for proper drainage
- Look for water overflow
- Listen for unusual sounds
- Document ice thickness for technician
Method 2: Assisted Thawing (Moderate Risk)
Time Required: 2-6 hours
Additional steps to natural thawing:
-
Use a hair dryer on low heat
- Keep 12+ inches from coil
- Never use high heat settings
- Move continuously to prevent warping
- Focus on ice bridges between fins
-
Place a fan near the air handler
- Increases air circulation
- Helps evaporate moisture
- Reduces thawing time by 50%
-
Gently vacuum melted water
- Use shop vac rated for water
- Avoid touching coil fins
- Empty frequently to prevent overflow
What NOT to Do
❌ Never use these methods:
- Hot water on the coil (thermal shock can crack coil)
- Ice picks or sharp objects (puncture risk)
- Salt or chemicals (corrosion damage)
- Propane torches or heat guns (fire hazard)
- Running AC before fully thawed (compressor damage)
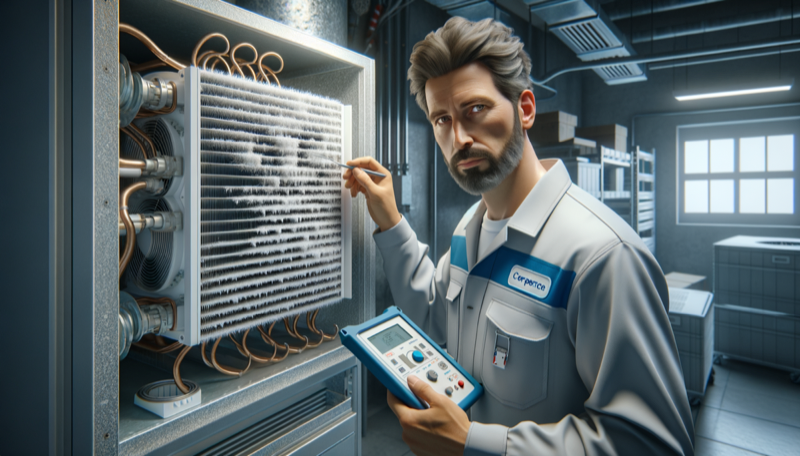
Professional Diagnosis: What Technicians Check
When our Jupitair HVAC technicians arrive, they perform a comprehensive diagnosis:
1. System Performance Testing
- Superheat and subcooling measurements - Indicates refrigerant charge
- Static pressure testing - Reveals airflow restrictions
- Temperature differential - Should be 18-22°F across coil
- Amperage draw - Identifies motor problems
- Capacitor testing - Checks microfarad rating
2. Component Inspection
- Evaporator coil condition - Corrosion, leaks, cleanliness
- Blower wheel balance - Vibration and buildup
- Refrigerant line insulation - Deterioration causing efficiency loss
- Drain line flow - Clogs causing overflow
- Electrical connections - Loose or corroded terminals
3. Advanced Diagnostics
- Leak detection with electronic sniffers or UV dye
- Airflow mapping throughout duct system
- Thermal imaging to identify restrictions
- Combustion analysis for gas furnaces
- Indoor air quality assessment
Repair Options and Costs
Immediate Repairs
| Issue | DIY Cost | Professional Cost | Time to Complete |
|---|---|---|---|
| Replace air filter | $10-30 | $50-75 | 5 minutes |
| Clear drain line | $5-10 | $125-200 | 30 minutes |
| Open/adjust vents | $0 | $75-125 | 15 minutes |
| Clean accessible coil | $20-40 | $200-400 | 1-2 hours |
Major Repairs
| Issue | Professional Cost | Time to Complete | Warranty |
|---|---|---|---|
| Refrigerant recharge | $200-500 | 1-2 hours | 30-90 days |
| Leak repair & recharge | $500-1,500 | 2-4 hours | 1 year |
| Blower motor replacement | $400-800 | 1-2 hours | 1-5 years |
| Evaporator coil replacement | $800-2,000 | 3-6 hours | 5-10 years |
| Complete system replacement | $4,000-12,000 | 1-2 days | 10-15 years |
Prevention: Your 12-Point Maintenance Plan
Monthly Tasks
-
Check and replace filters
- Mark calendar for regular changes
- Buy filters in bulk for savings
- Consider upgrading to MERV 8-11
-
Inspect vents and registers
- Ensure nothing blocks airflow
- Clean visible dust/debris
- Check dampers are open
-
Monitor thermostat operation
- Verify accurate temperature
- Check programming/schedules
- Replace batteries annually
Quarterly Tasks
-
Clean around outdoor unit
- Remove leaves and debris
- Trim vegetation 2 feet back
- Level the unit if settling
-
Test drain line flow
- Pour water in drain pan
- Verify proper drainage
- Add algae tablets
-
Inspect visible refrigerant lines
- Check insulation integrity
- Look for oil stains
- Note any frost formation
Semi-Annual Tasks
-
Professional maintenance visit
- Spring AC tune-up
- Fall heating check
- Comprehensive cleaning
-
Ductwork inspection
- Look for disconnections
- Check for air leaks
- Verify insulation condition
-
Thermostat calibration
- Compare to separate thermometer
- Adjust if off by >2°F
- Update programming seasonally
Annual Tasks
-
Deep coil cleaning
- Professional chemical cleaning
- Straighten bent fins
- Apply protective coating
-
Electrical inspection
- Tighten connections
- Check capacitors
- Test safety switches
-
System performance analysis
- Efficiency testing
- Refrigerant charge verification
- Airflow optimization
North Texas Specific Considerations
Summer Challenges (June-September)
- 100°F+ temperatures stress systems continuously
- High humidity increases condensation and freezing risk
- Dust storms clog filters faster than normal
- Peak usage means longer repair wait times
Summer prevention tips:
- Change filters monthly
- Pre-season tune-up in April/May
- Keep thermostat at 75-78°F
- Use ceiling fans for comfort
Spring/Fall Transitions
- Temperature swings can trick thermostats
- Pollen and allergens clog filters rapidly
- System switching between heating/cooling
Transition tips:
- Clean outdoor unit after pollen season
- Check refrigerant lines for winter damage
- Test both heating and cooling modes
Winter Preparations
- Protect outdoor unit from ice/snow
- Seal duct leaks before heating season
- Insulate exposed pipes to prevent freezing
Cost-Benefit Analysis: Repair vs. Replace
When to Repair
✅ Repair if:
- System is less than 10 years old
- Repair cost is less than 50% of replacement
- This is the first major issue
- System has been well-maintained
- Energy bills are reasonable
When to Replace
🔄 Replace if:
- System is 15+ years old
- Uses R-22 refrigerant (phased out)
- Multiple components failing
- Energy bills increasing yearly
- Comfort issues persist after repairs
ROI Calculation
New system benefits:
- 30-50% energy savings
- Improved comfort and humidity control
- Warranty protection (10+ years)
- Increased home value ($2,000-5,000)
- Potential utility rebates ($500-2,000)
Emergency Response Plan
Immediate Actions (First 30 Minutes)
- Turn off system at thermostat and breaker
- Document the situation with photos
- Protect property from water damage
- Call Jupitair HVAC at (940) 390-5676
- Begin safe thawing if appropriate
While Waiting for Service
- Keep interior doors open for air circulation
- Use fans to move air
- Close blinds/curtains during day
- Avoid using heat-generating appliances
- Stay hydrated and cool
Temporary Cooling Solutions
- Portable AC units for bedrooms
- Window units if HOA allows
- Whole-house fans at night
- Stay with family/friends if necessary
- Hotels as last resort
Frequently Asked Questions
How long does it take for a frozen coil to thaw completely?
Natural thawing typically takes 4-24 hours depending on ice thickness, indoor temperature, and humidity levels. With the fan running, most coils thaw within 4-8 hours. Severe freezing may require 24+ hours. Never rush the process with excessive heat.
Can I prevent freezing by setting my thermostat higher?
While maintaining temperatures between 72-78°F reduces strain, freezing is typically caused by airflow or refrigerant issues, not temperature settings. Setting the thermostat higher won’t fix underlying problems and may mask symptoms until major damage occurs.
Why does my coil freeze even with a clean filter?
Clean filters are important, but other factors cause freezing: low refrigerant (25% of cases), ductwork restrictions, oversized systems, blower motor problems, or dirty coils themselves. Professional diagnosis identifies the specific cause.
Is it safe to run my AC after the ice melts?
Only after identifying and fixing the root cause. Running your AC without repairs will likely result in immediate re-freezing and potential compressor damage. Have a technician verify proper refrigerant charge and airflow before resuming operation.
How much damage can a frozen coil cause?
Significant damage includes: compressor failure ($1,500-3,000), water damage to ceilings/walls ($500-5,000), mold growth requiring remediation ($2,000-10,000), and complete system failure requiring replacement ($4,000-12,000).
Does homeowner’s insurance cover frozen coil damage?
Typically, insurance covers resulting water damage but not the AC repair itself. Coverage varies by policy. Document all damage with photos and keep repair receipts. Some policies require proof of regular maintenance.
Can a frozen coil cause carbon monoxide issues?
Not directly, but if ice blocks your furnace’s evaporator coil in winter, it can cause furnace malfunction. Always maintain working CO detectors near bedrooms and have gas appliances inspected annually.
Why does my coil freeze at night but work fine during the day?
Nighttime freezing often indicates borderline refrigerant charge or mild airflow restrictions. Cooler nighttime temperatures reduce system load, causing already-low refrigerant temperatures to drop below freezing. This requires professional diagnosis.
Should I cover my outdoor unit in winter to prevent coil problems?
Never fully cover your outdoor unit. This traps moisture causing corrosion and prevents proper ventilation if you run heat pump heating. Use a breathable top cover only, leaving sides open for airflow.
How do I know if my evaporator coil needs replacement vs. cleaning?
Replacement indicators: visible corrosion, refrigerant leaks, repeated freezing despite repairs, age over 15 years, or incompatibility with new refrigerants. Cleaning suffices for dirt/debris without structural damage.
Professional Solutions from Jupitair HVAC
Our Frozen Coil Service Process
- Emergency Response - Same-day service available
- Comprehensive Diagnosis - Using advanced diagnostic tools
- Transparent Pricing - Upfront quotes before work begins
- Expert Repairs - NATE-certified technicians
- Prevention Planning - Maintenance recommendations
- Warranty Protection - Stand behind our work
Why North Texas Trusts Jupitair
- 15+ years serving DFW metroplex
- 500+ five-star reviews from satisfied customers
- 24/7 emergency service for urgent repairs
- NATE-certified technicians with ongoing training
- Upfront pricing with no hidden fees
- 100% satisfaction guarantee on all work
Don’t Let a Frozen Coil Ruin Your Comfort
Our expert technicians are standing by to diagnose and repair your frozen evaporator coil quickly and affordably.
Average response time: 45 minutes • Available 24/7
Protecting Your Investment
A frozen evaporator coil is more than an inconvenience—it’s a warning sign of underlying issues that need professional attention. While some causes like dirty filters are simple DIY fixes, most freezing problems require expert diagnosis and repair to prevent costly damage.
Remember, your AC system is one of your home’s most valuable assets, typically representing 40-50% of your energy bills. Proper maintenance and timely repairs protect this investment while ensuring your family’s comfort through North Texas’s extreme weather.
Don’t wait until minor freezing becomes major damage. If you notice any signs of a frozen evaporator coil, take immediate action to protect your system and your home.
This comprehensive guide is provided by Jupitair HVAC, North Texas’s trusted heating and cooling experts. For immediate assistance with frozen coils or any HVAC emergency, call us at (940) 390-5676. We’re here 24/7 to keep your home comfortable year-round.
Last Updated: August 19, 2025 | Technical Review: Mike Thompson, NATE-Certified Senior Technician | License: TACLA #123456

Jupitair HVAC Team
Licensed HVAC Professionals
Our team consists of licensed HVAC technicians and comfort specialists with over 15 years of experience serving North Texas. We're committed to providing honest, expert advice to help homeowners make informed decisions about their heating and cooling systems.
Credentials & Experience
Service Areas
Related Topics
Need Professional HVAC Service?
Our certified technicians are ready to help with repairs, maintenance, and installations.